How to Build a SaaS Admin Panel With an AI Assistant in Next.js
Build an admin panel with an AI assistant in Next.js: roles, projects, users, Arabic and RTL, Docker setup and going live, shown with a worked example.
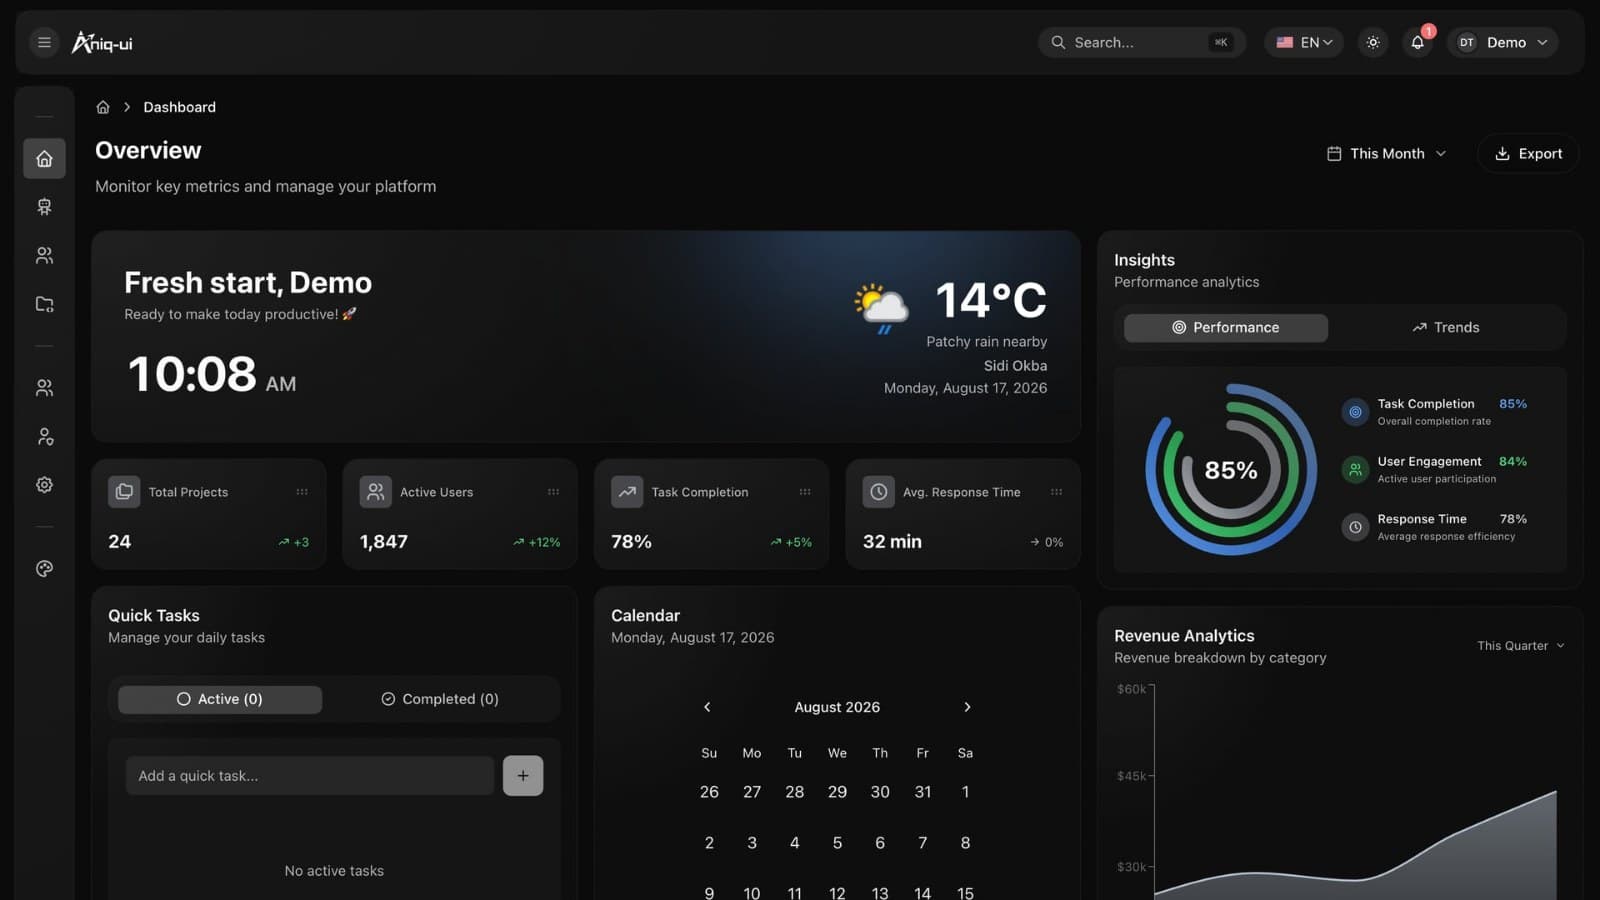
By the end of this guide you will have an internal admin panel with an AI assistant running on your computer and ready for a server. It is a Next.js dashboard with its own API behind it, and you build it from the Aniq UI Admin Dashboard Template 2 instead of starting from an empty folder.
The steps work for a SaaS admin panel, a back office for a small company, or any internal tool where a team needs lists, roles and a way to ask questions about their own data. To keep it concrete, we walk one made-up company through the whole job, from the first download to a live address, and we stop at every point where something usually goes wrong.
Before you start: decisions to make
Most of the pain in an internal tool comes from choices made late. Settle these six before you open a terminal, and the rest of the guide goes faster.
- Who signs in, and what may each person do? Write the list of roles on paper first. The template ships five (Super Admin, Admin, Manager, Editor, Viewer) and you can reshape them, but it is easier to reshape with a plan.
- What are your records? The template comes with users, projects, tasks and app settings. If your business revolves around something else, such as orders or tickets, decide now whether you will rename what exists or add a new module to the API.
- Which languages? English and Arabic ship. A third language is possible but is more work, so know before you start whether you need it.
- Who pays for AI? Either the company holds one provider key on the server, or each person brings their own. The choice changes your bill and your privacy story, and step 8 covers both.
- Where will it run? A single small server using Docker, or Vercel for the dashboard with the API on a Docker host. Pick the shape early so you set the right addresses once.
- Which database? SQLite is the default and needs no setup. MySQL is a configuration change. A host without a persistent disk is the usual reason to pick MySQL.
The brief
Larkspur Software is a small agency that builds web apps for other companies. The office needs one place to run its work. Here is what the team asks for:
- A sign-in for staff, with different levels of access: the owner sees everything, developers edit projects, contractors only read.
- A list of every client project, with its status, its environment (staging or production) and its current version.
- A list of client accounts, with a quick way to find the ones who never verified their email.
- An assistant that answers plain questions such as "which projects are blocked?" and shows the answer as a table or a chart.
- English and Arabic, because two client teams read Arabic.
- A first run on a laptop, then a small server on the agency's own domain.
- Control over who can use the assistant, since it can change records and the AI provider bills for usage.
How the template covers the brief
| Need | Where it lives | What you use |
|---|---|---|
| Staff with different access | Dashboard and API | Admin Management and Admin Roles screens; permissions named like projects.edit |
| Client project tracking | Dashboard and API | Projects screen with status, environment, version and an English and Arabic name |
| Client accounts | Dashboard and API | Users and Deleted users screens, filters, verify and restore actions |
| Plain-language questions | Dashboard and API | AI Assistant screen, with a provider key from you |
| English and Arabic | Dashboard | /en and /ar addresses, message files under messages/ |
| Laptop, then a server | Docker and configuration | Docker Compose, .env files, a web server in front |
| Control over the assistant | API | The ai_chat.use permission on a role |
Template, from scratch or a hosted builder
There are three honest ways to get an admin panel with an AI assistant, and each fits a different team.
From scratch. You get exactly the structure you want and nothing extra. You also build sign-in, roles with live updates, filtered lists, a chat interface that renders tables and charts, and the API behind all of it. This suits teams with an unusual product and plenty of engineering time. For everyone else it means a long stretch spent on screens that every admin panel needs.
A hosted builder. A low-code or internal-tool service gets you a working screen quickly and handles hosting for you. In exchange you work inside its component set and its pricing model, and moving away later usually means rebuilding. Check what it charges per user, what you can export, and whether it supports right-to-left layouts before you commit.
A template with source code. You start with finished screens, a working API and an assistant, and you own the code. You pay once for the template, host it yourself, and change anything you like. The cost is that you must be comfortable with Next.js, and later with NestJS if you extend the API. The license does not let you publish or resell the source, but it does cover unlimited projects, including ones for clients.
Larkspur has developers on staff and wants to keep client data on its own server, so it takes the template route. If nobody on your team writes code, a hosted builder is the more realistic choice.
An example launch plan by week
This is a sample schedule for Larkspur, not a benchmark. Your own pace will differ.
- Week 1, get it running. Download the ZIP, start it with Docker, click through every screen, and try both sample accounts. Decide the six questions above.
- Week 2, make it theirs. Brand it, rebuild the roles, create the real staff accounts, and delete the sample admins.
- Week 3, load the work. Enter real projects and client accounts, add provider keys, and let two or three people use the assistant with real questions.
- Week 4, harden and ship. Set production environment values, deploy to the server, check the health address, and walk through the launch checklist near the end of this post.
Step by step
1. Choose the package
The template comes in three packages. The Full Stack package holds the dashboard and the NestJS API. The Admin Dashboard package is the dashboard alone, running against a small mock server built into it, with the sample records stored in your browser. The Backend API package is the API alone.
Larkspur wants real data and a real assistant, so it takes Full Stack. If you only want to design screens first, the Admin Dashboard package is enough, and you can point it at an API later. If you already have a front end and only need the server, the Backend API package gives you the routes, the roles logic and the assistant's tools.
Check: after the download, your account should show a ZIP named for the package you bought. Usually goes wrong: buying the dashboard package and expecting an API in it. The dashboard alone cannot store anything outside the browser.
2. Run it locally with Docker
Install Docker Desktop (or Docker Engine on Linux) and nothing else. Then work through these sub-steps.
2a. Download. Open My templates in your Aniq UI account and download the Full Stack ZIP.
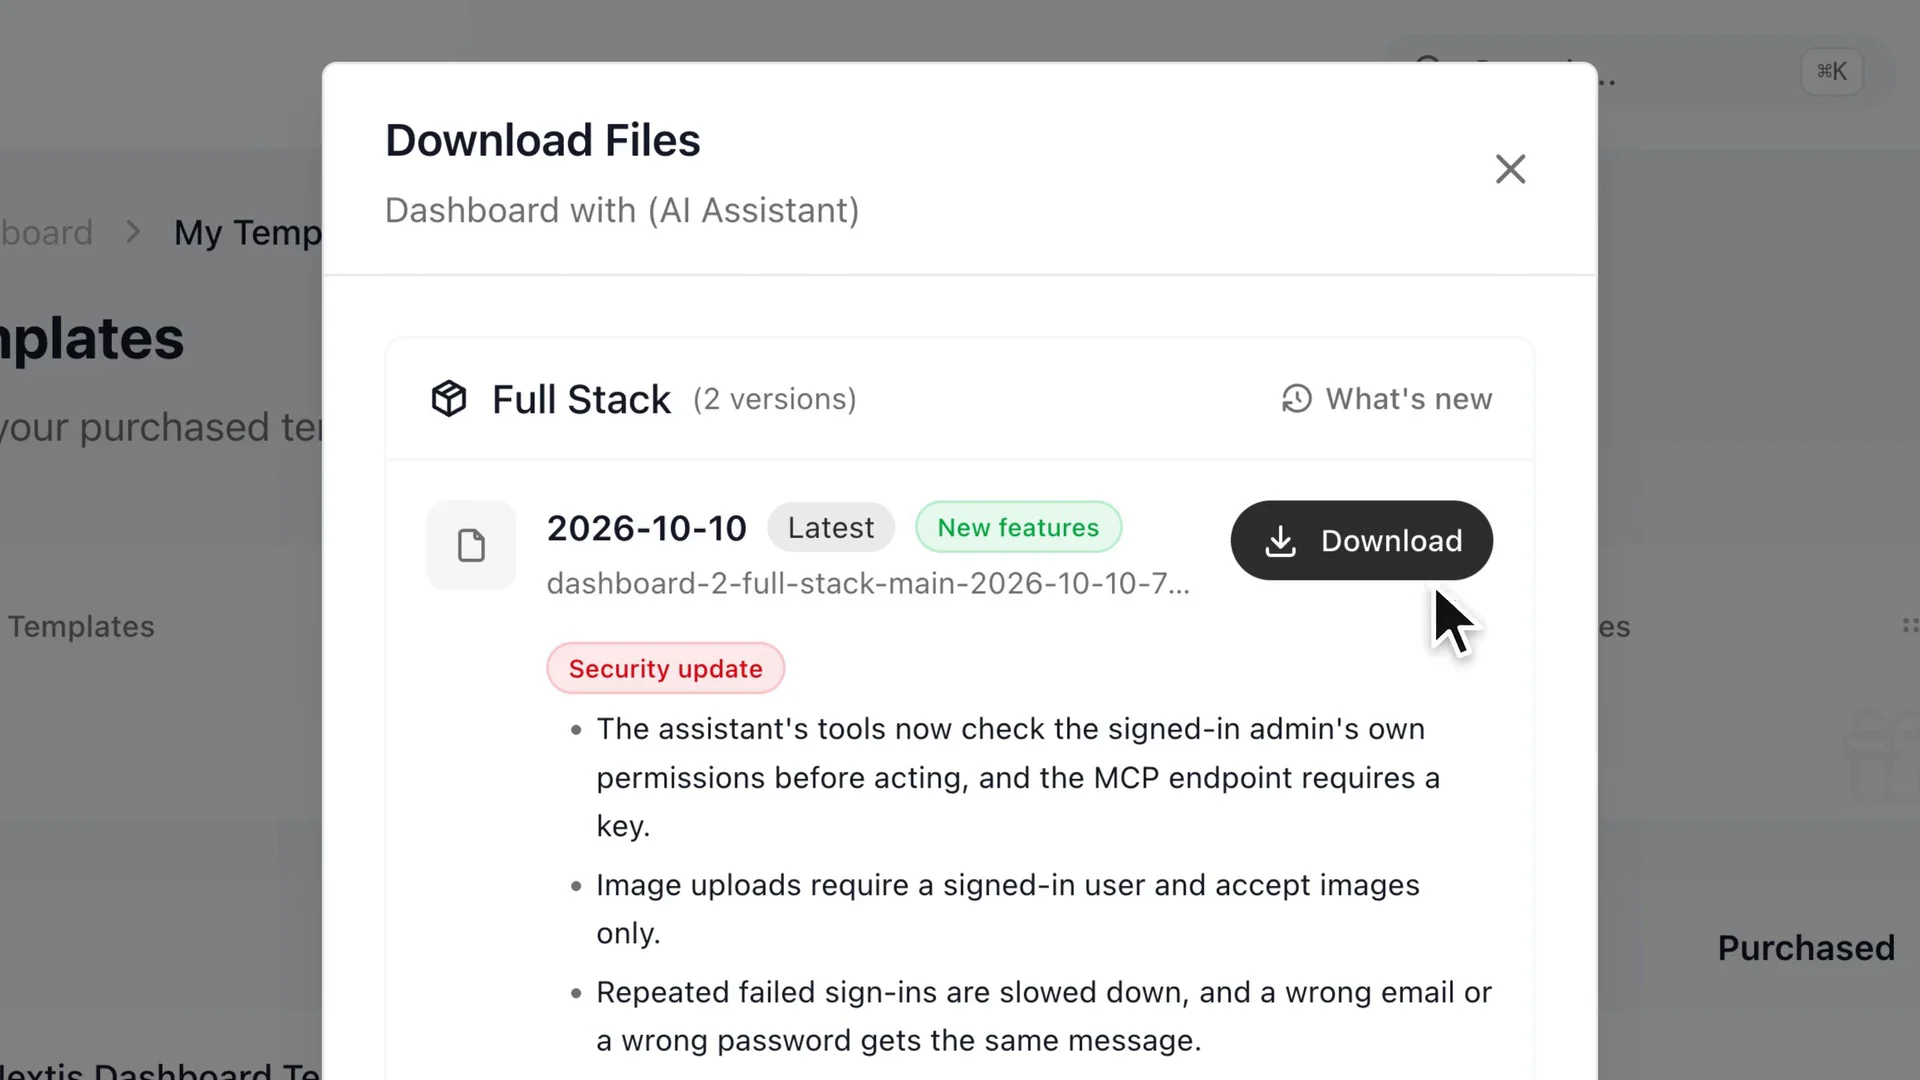
Look at which package is chosen on the download page, because the folder names in the later steps depend on it.
2b. Unzip and open the folder. Unpack the archive and start a terminal inside the dashboard-2-full-stack folder (on Windows, unpack it with File Explorer first).
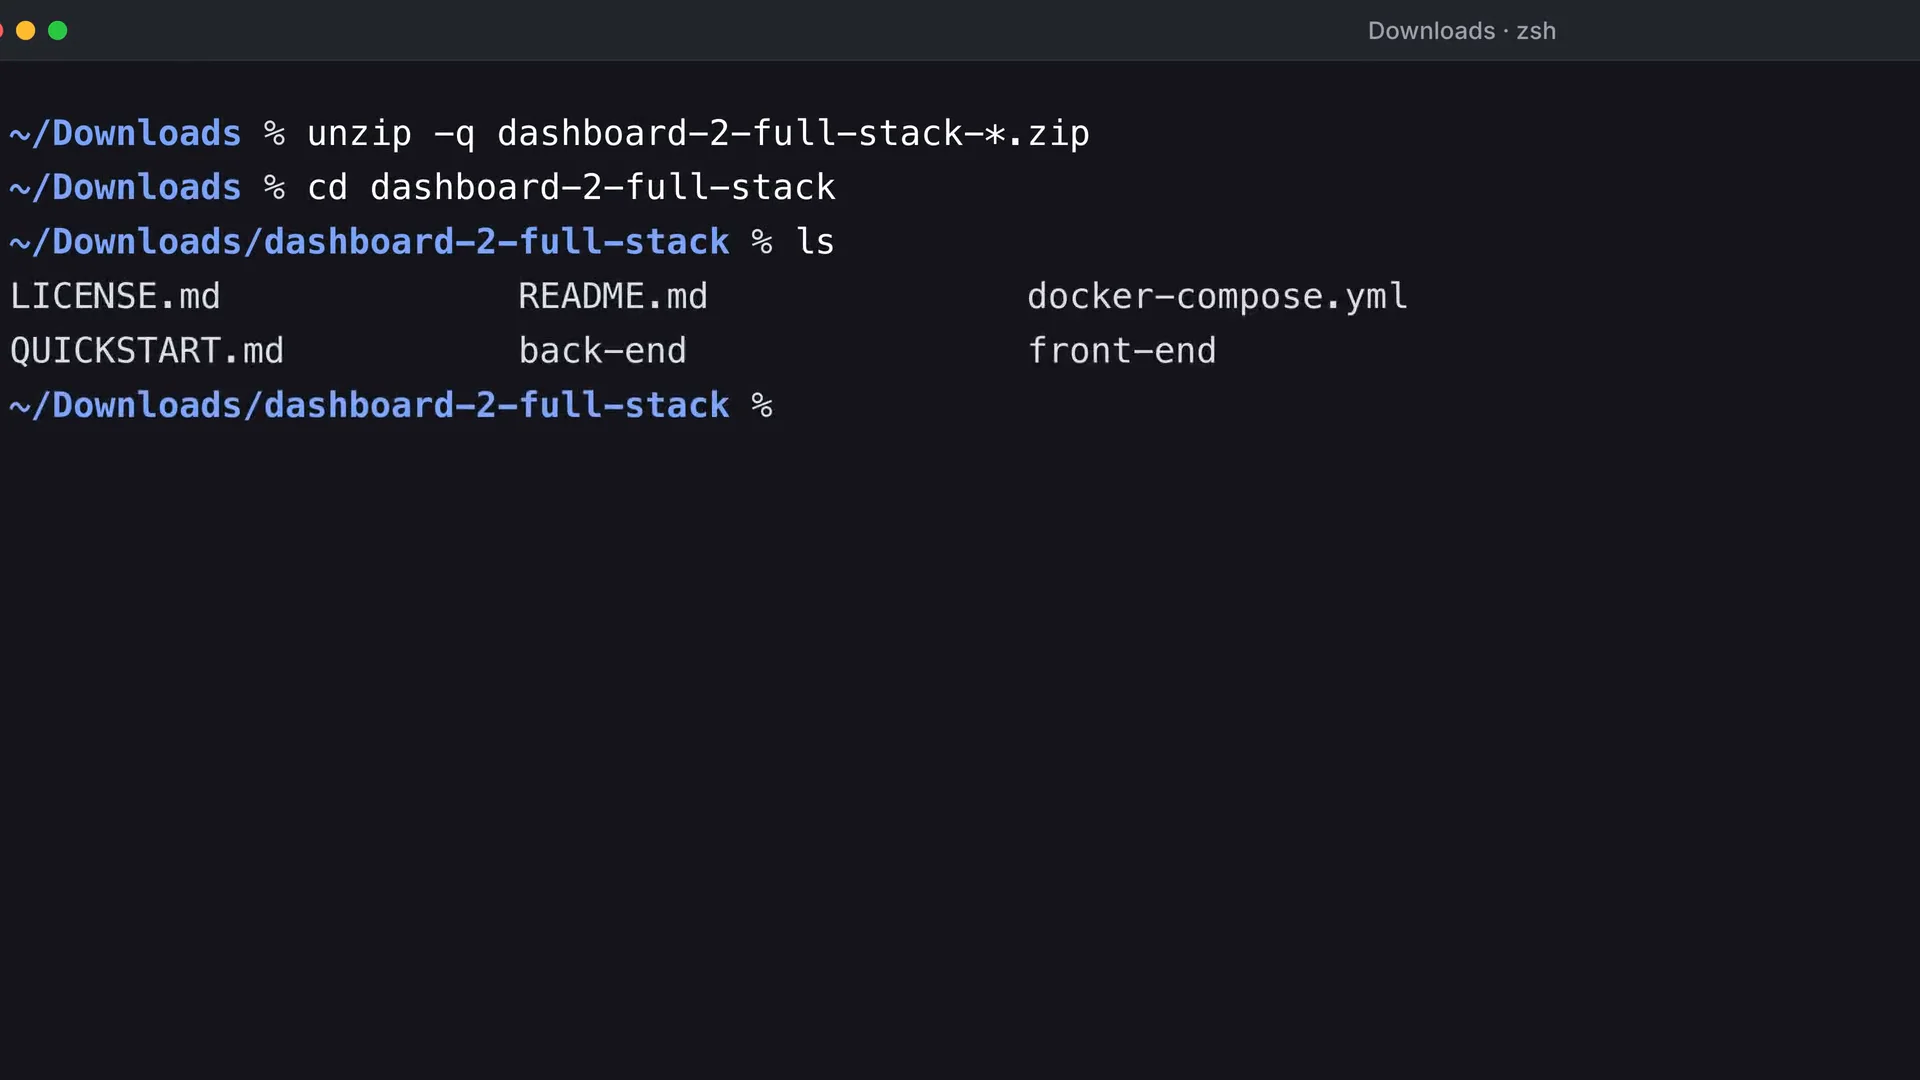
Look at the folder contents: you should see back-end, front-end and docker-compose.yml side by side.
2c. Start both apps.
docker compose up --buildOn the first start Docker builds two images and seeds the database, so give it a few minutes. Later starts take seconds.
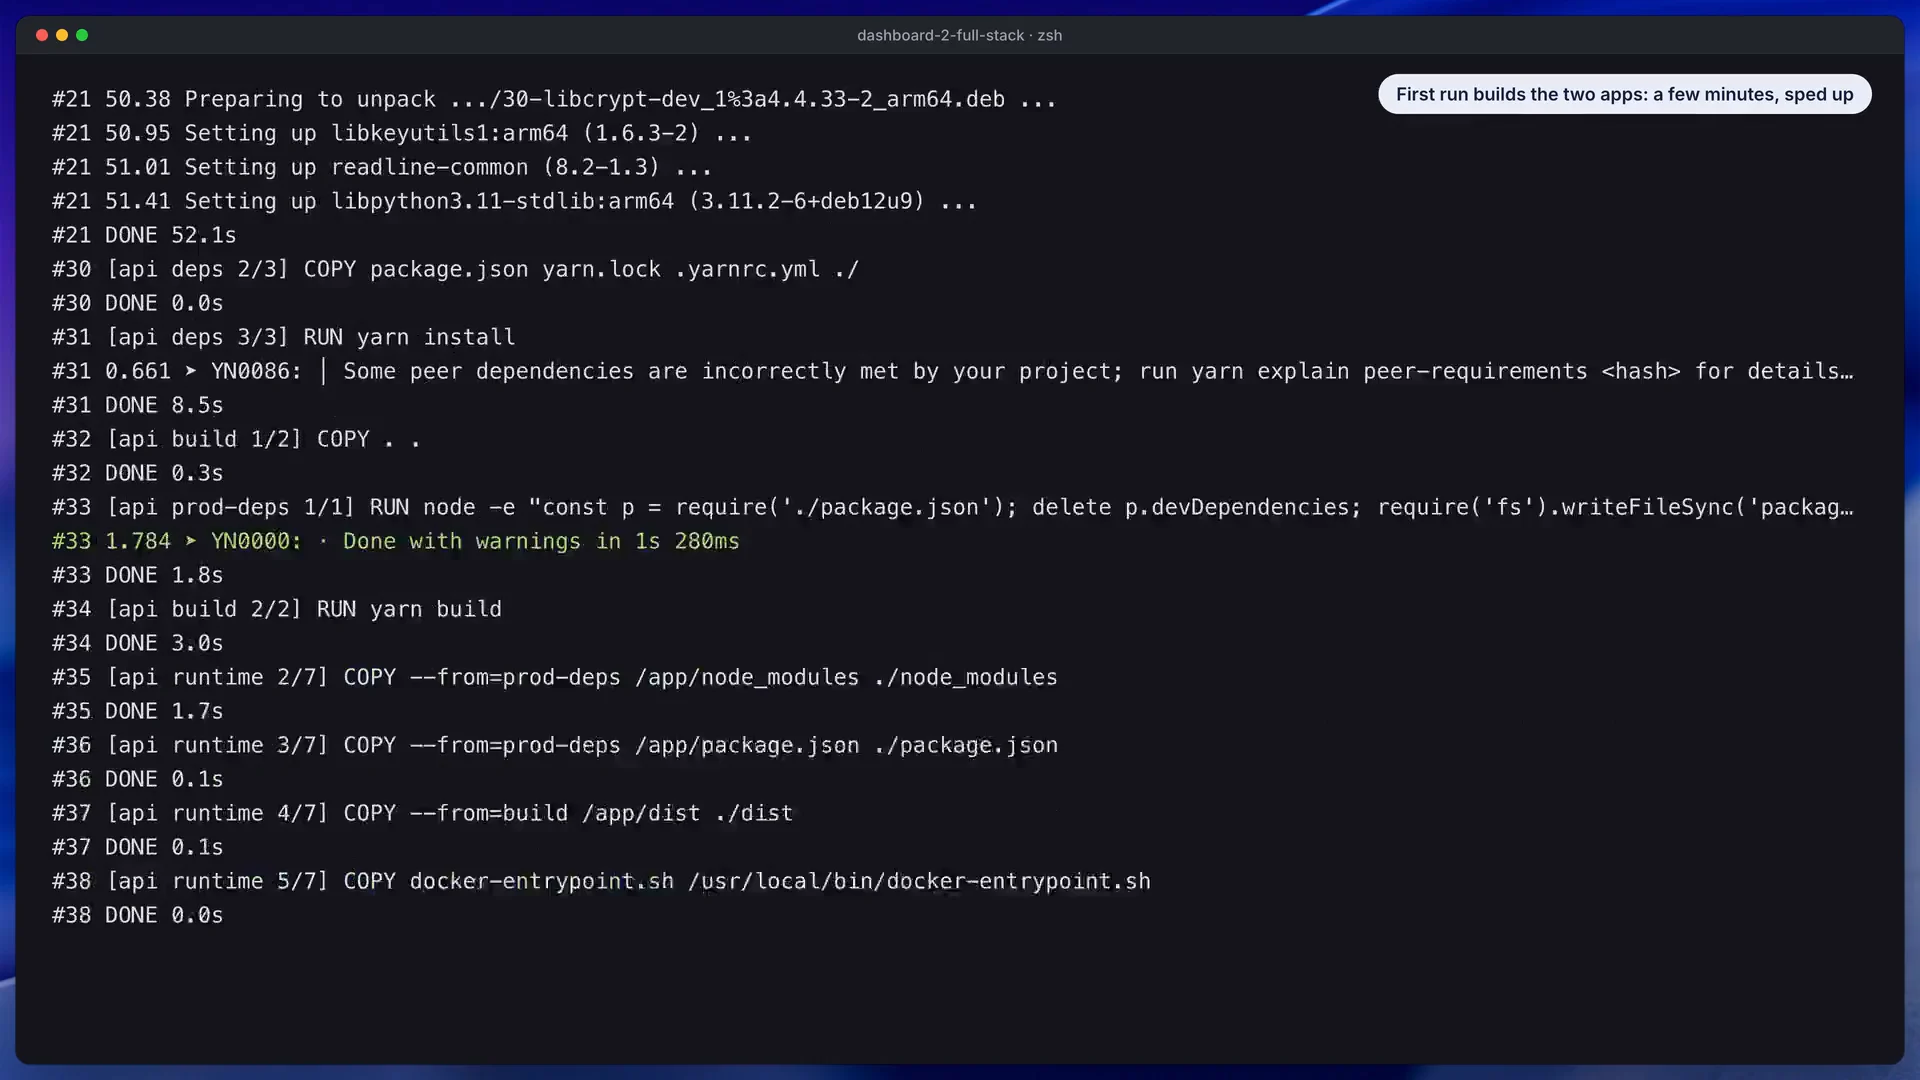
Look at the terminal: it prints build progress first, and the dashboard waits until the API reports itself healthy.
2d. Open it. Go to localhost:3030 and use the account admin@example.com with the password Admin@123. Arabic lives at /ar. The API answers at localhost:8000/api/health once its database is ready.
What to check: the health address should answer, and the dashboard should list data on its first screen. What usually goes wrong: a port is already in use. If another program holds 3030 or 8000, create a file named .env next to docker-compose.yml and set DASHBOARD_PORT=3040 (or API_PORT for the API), then run the same command again. A start that seems stuck is normally still seeding sample data.
To stop the apps, press Ctrl+C. Your data stays in a Docker volume. Be careful with docker compose down -v: the -v deletes the volume, and the next start brings back fresh sample data.
3. Know the other ways to run it
You will not use all of these, but each solves a real situation.
The dashboard alone. With the Admin Dashboard package, you build one image and start one container. With no API address set, it runs on its mock server and needs no back end.
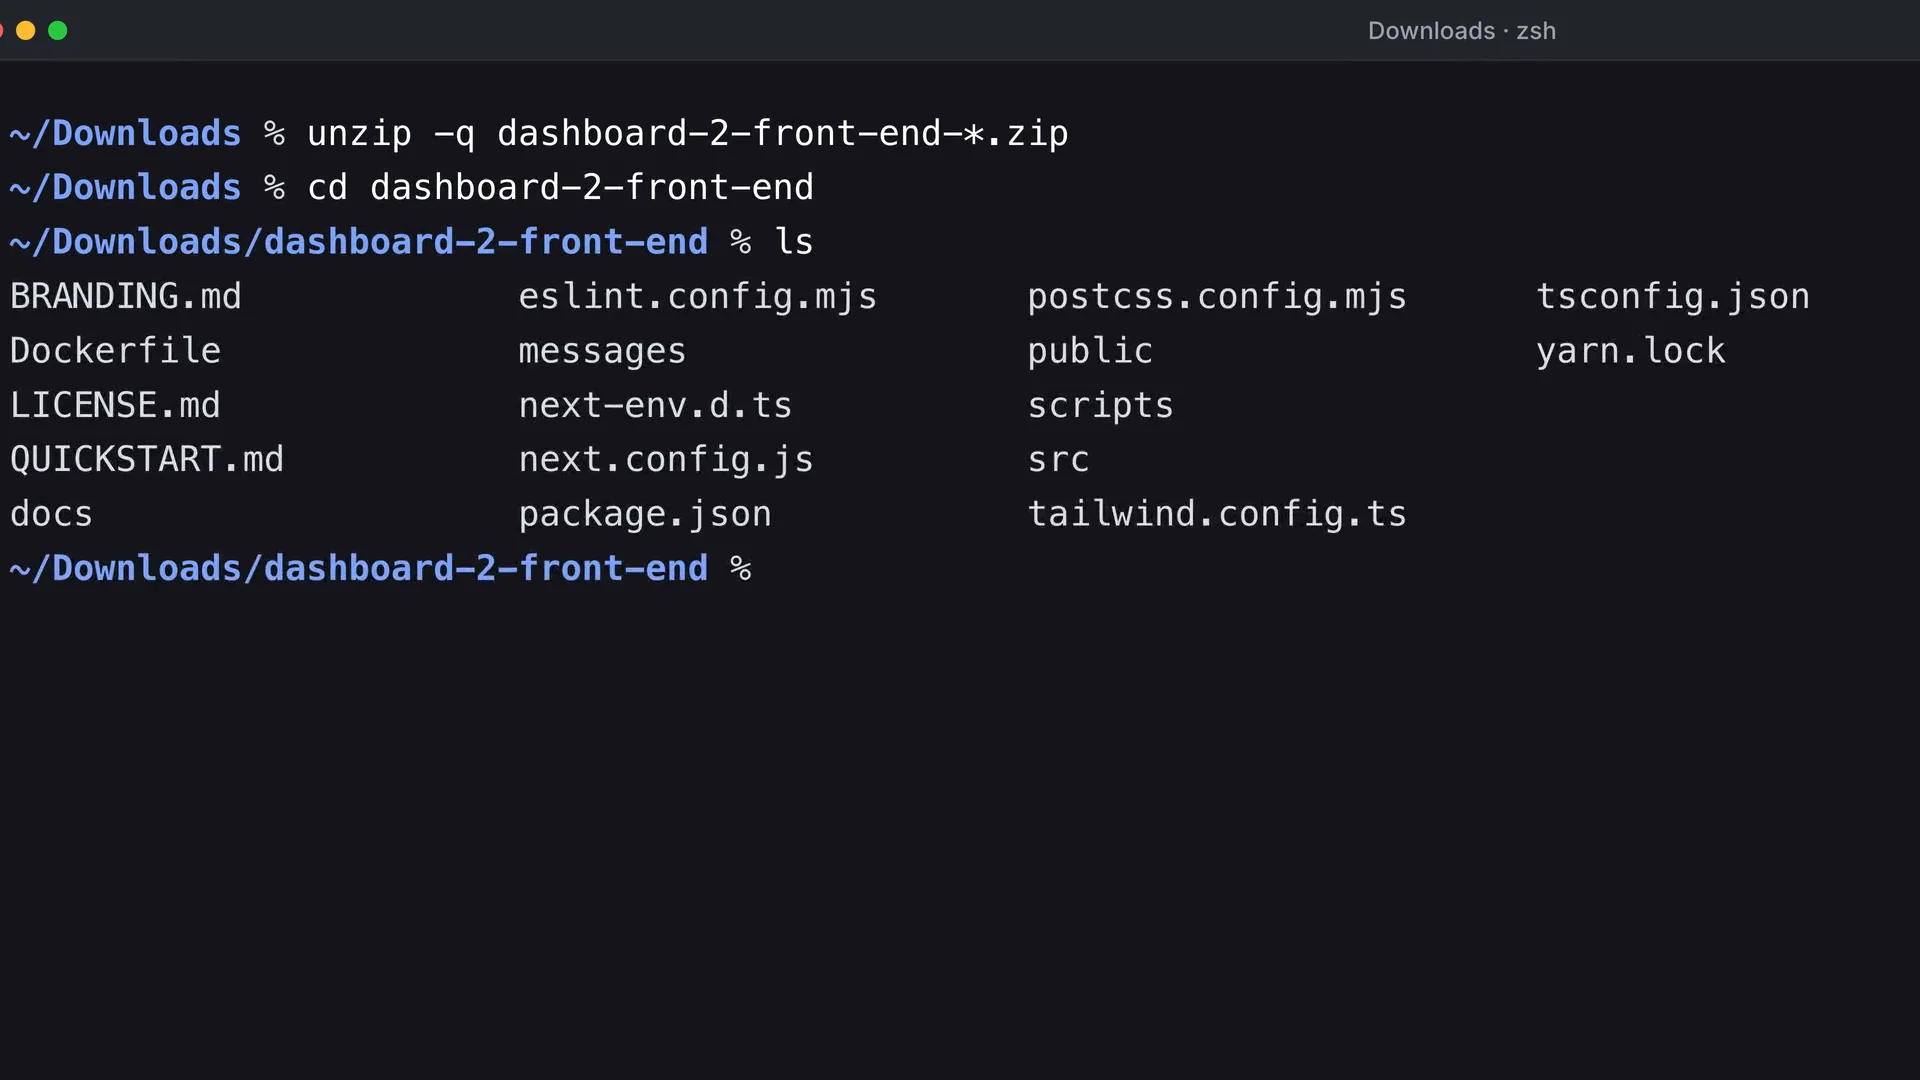
Look at the folder name in the terminal: this package extracts to a different folder than the Full Stack one.
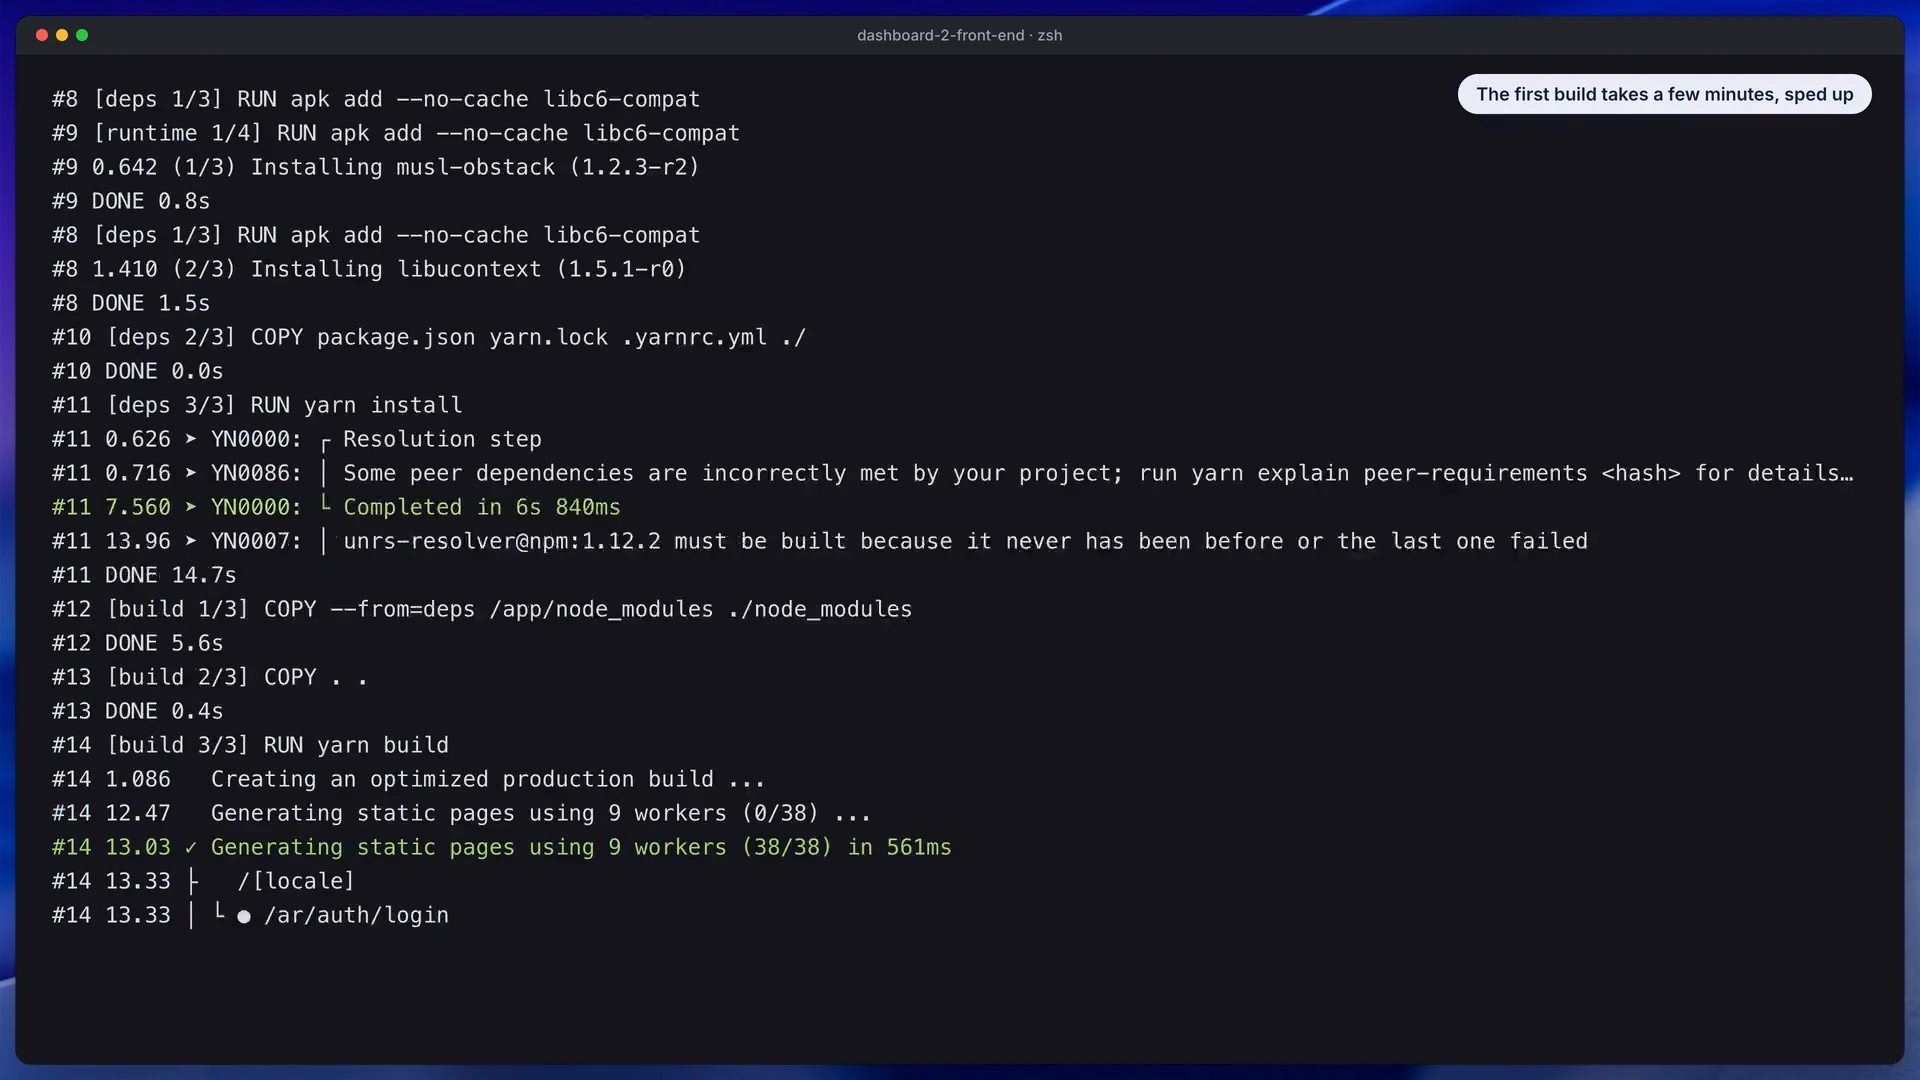
Look at the build output: the dependencies and the build both happen inside the image, so the first build needs an internet connection.
The API alone. With the Backend API package, you build an image and run it with a volume that holds the database file. The first run seeds that database with the sample records and accounts. Every route sits under /api, and you check it with the health address.
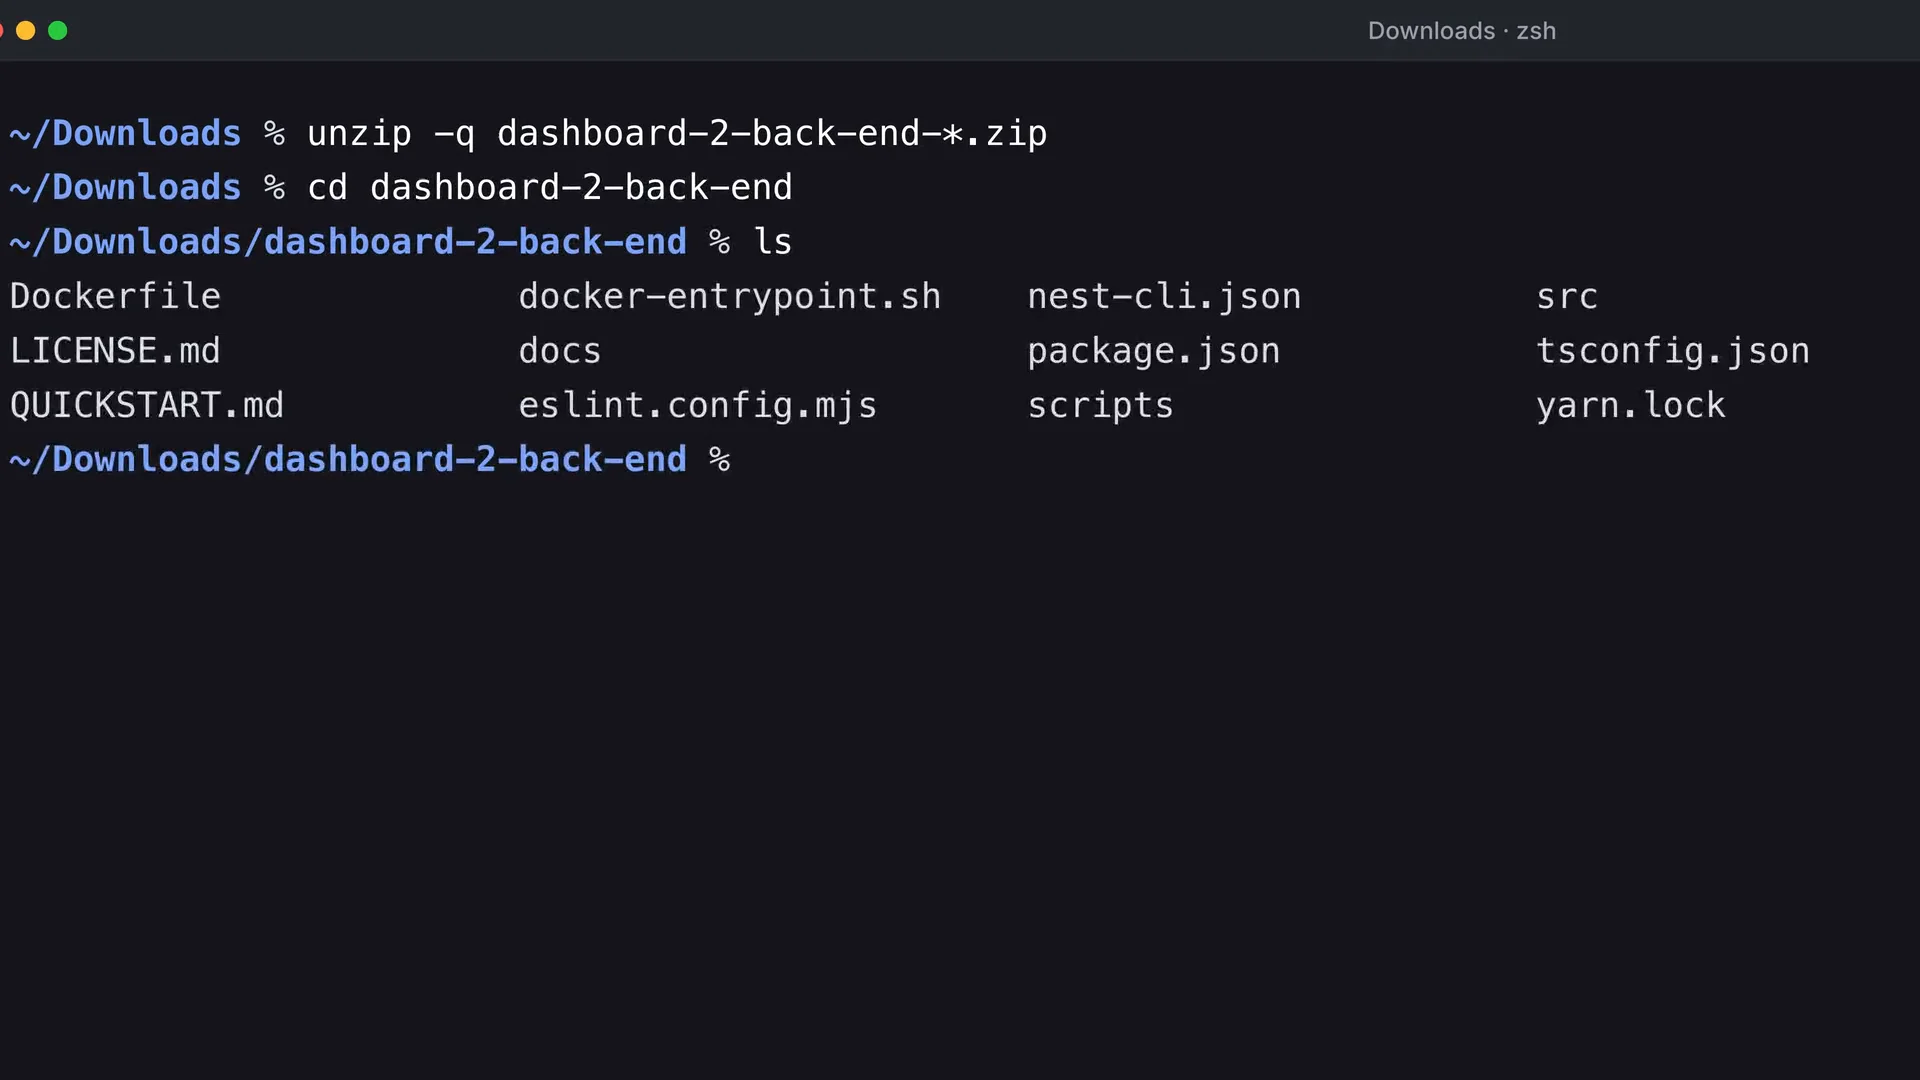
Look at the files in the folder, which include a Dockerfile, package.json and .env.example.
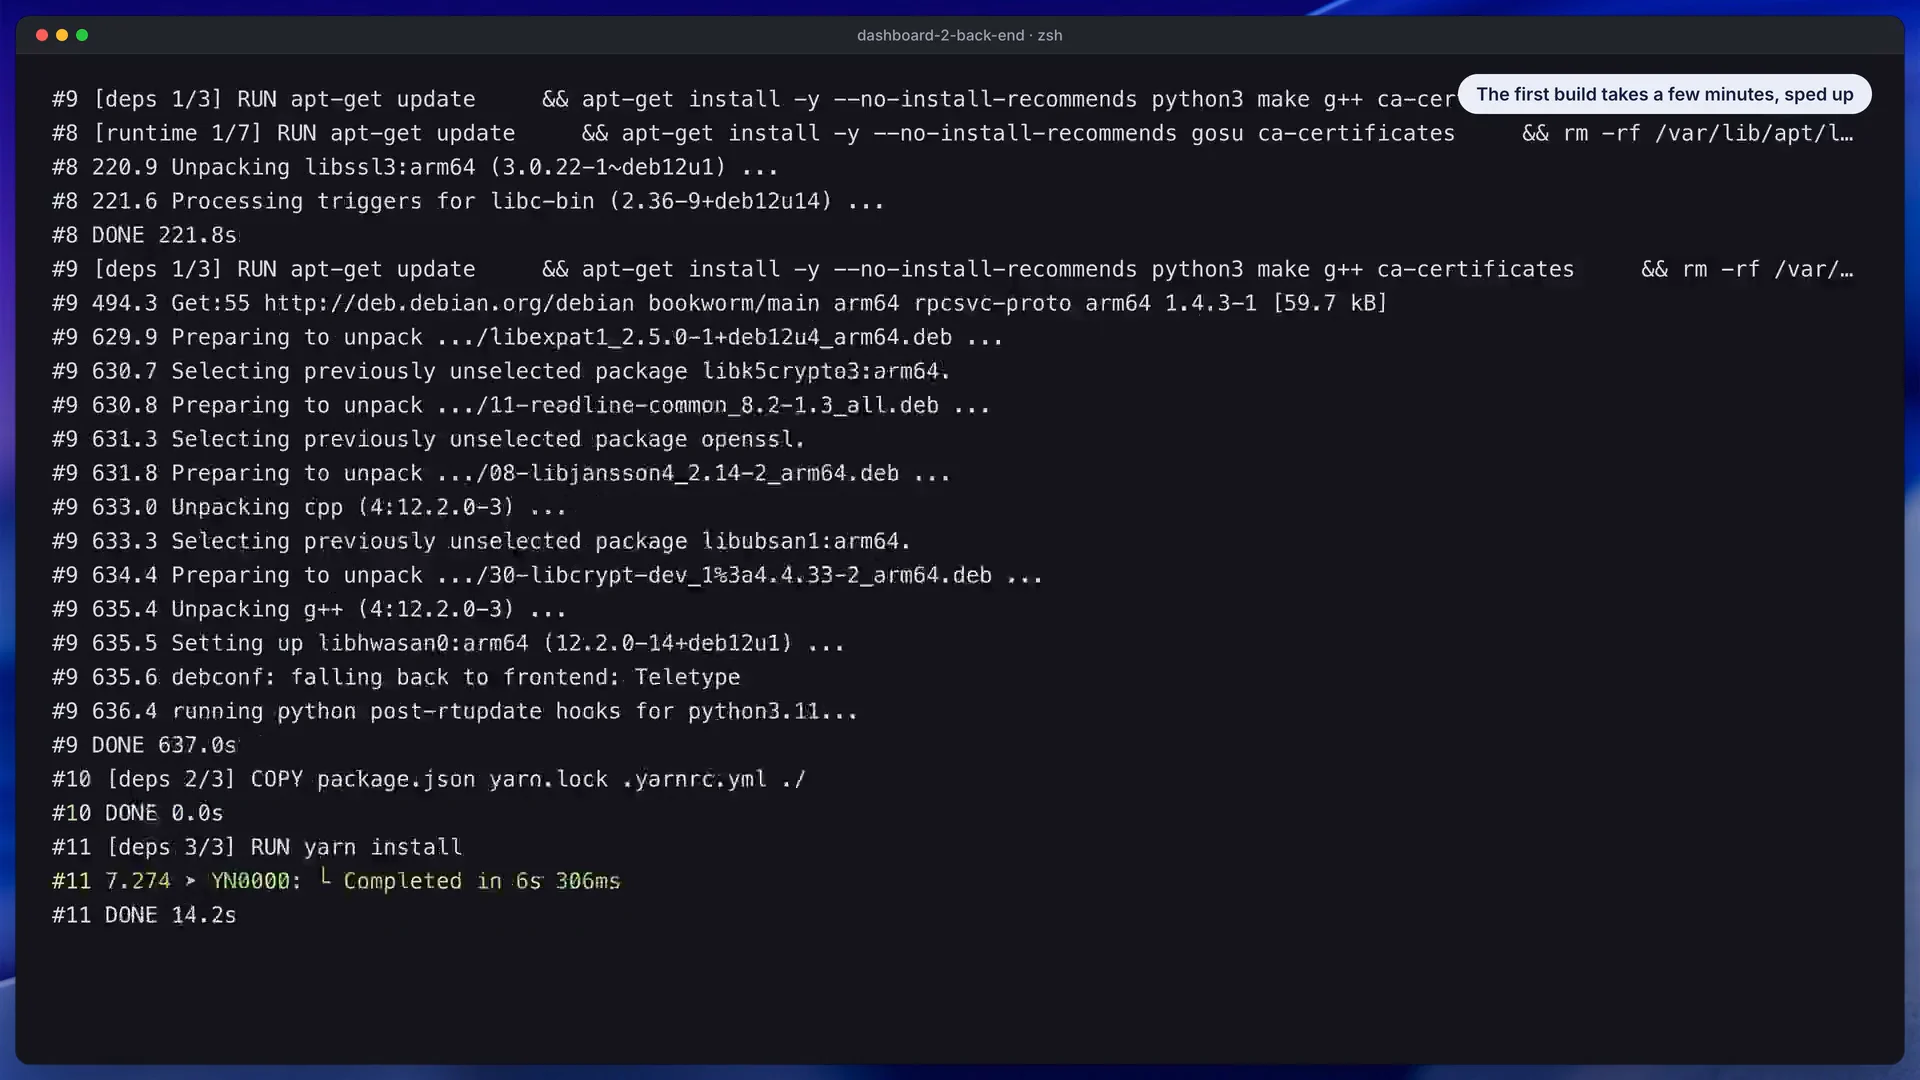
Look at the image being built: the API image is separate from the dashboard's.
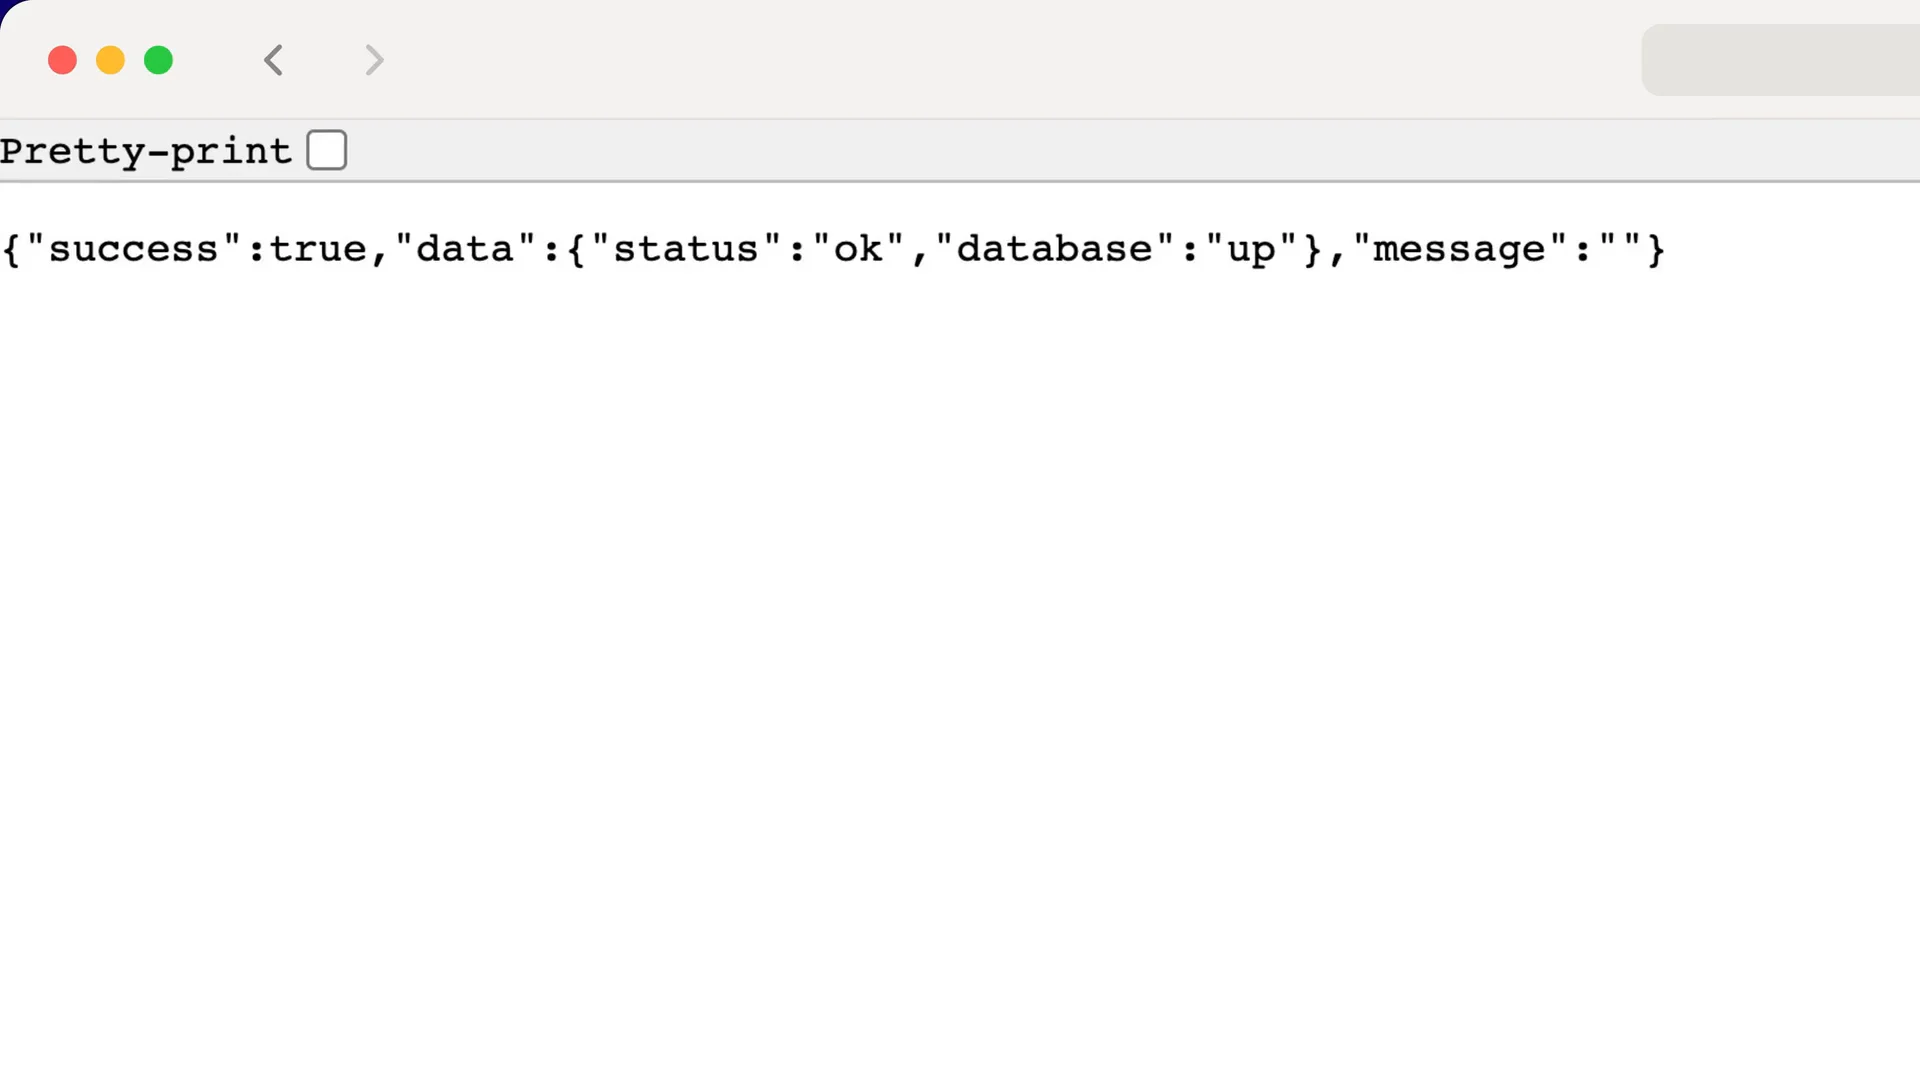
Look at the health check at the end: a working API answers with an ok status.
Without Docker. Install Node.js 22.9 or newer and run corepack enable once. Start the API first, because the dashboard reads all its data from it. In back-end, copy the example settings, create the database with yarn seed, then run yarn dev. In front-end, copy the example settings and start it the same way.
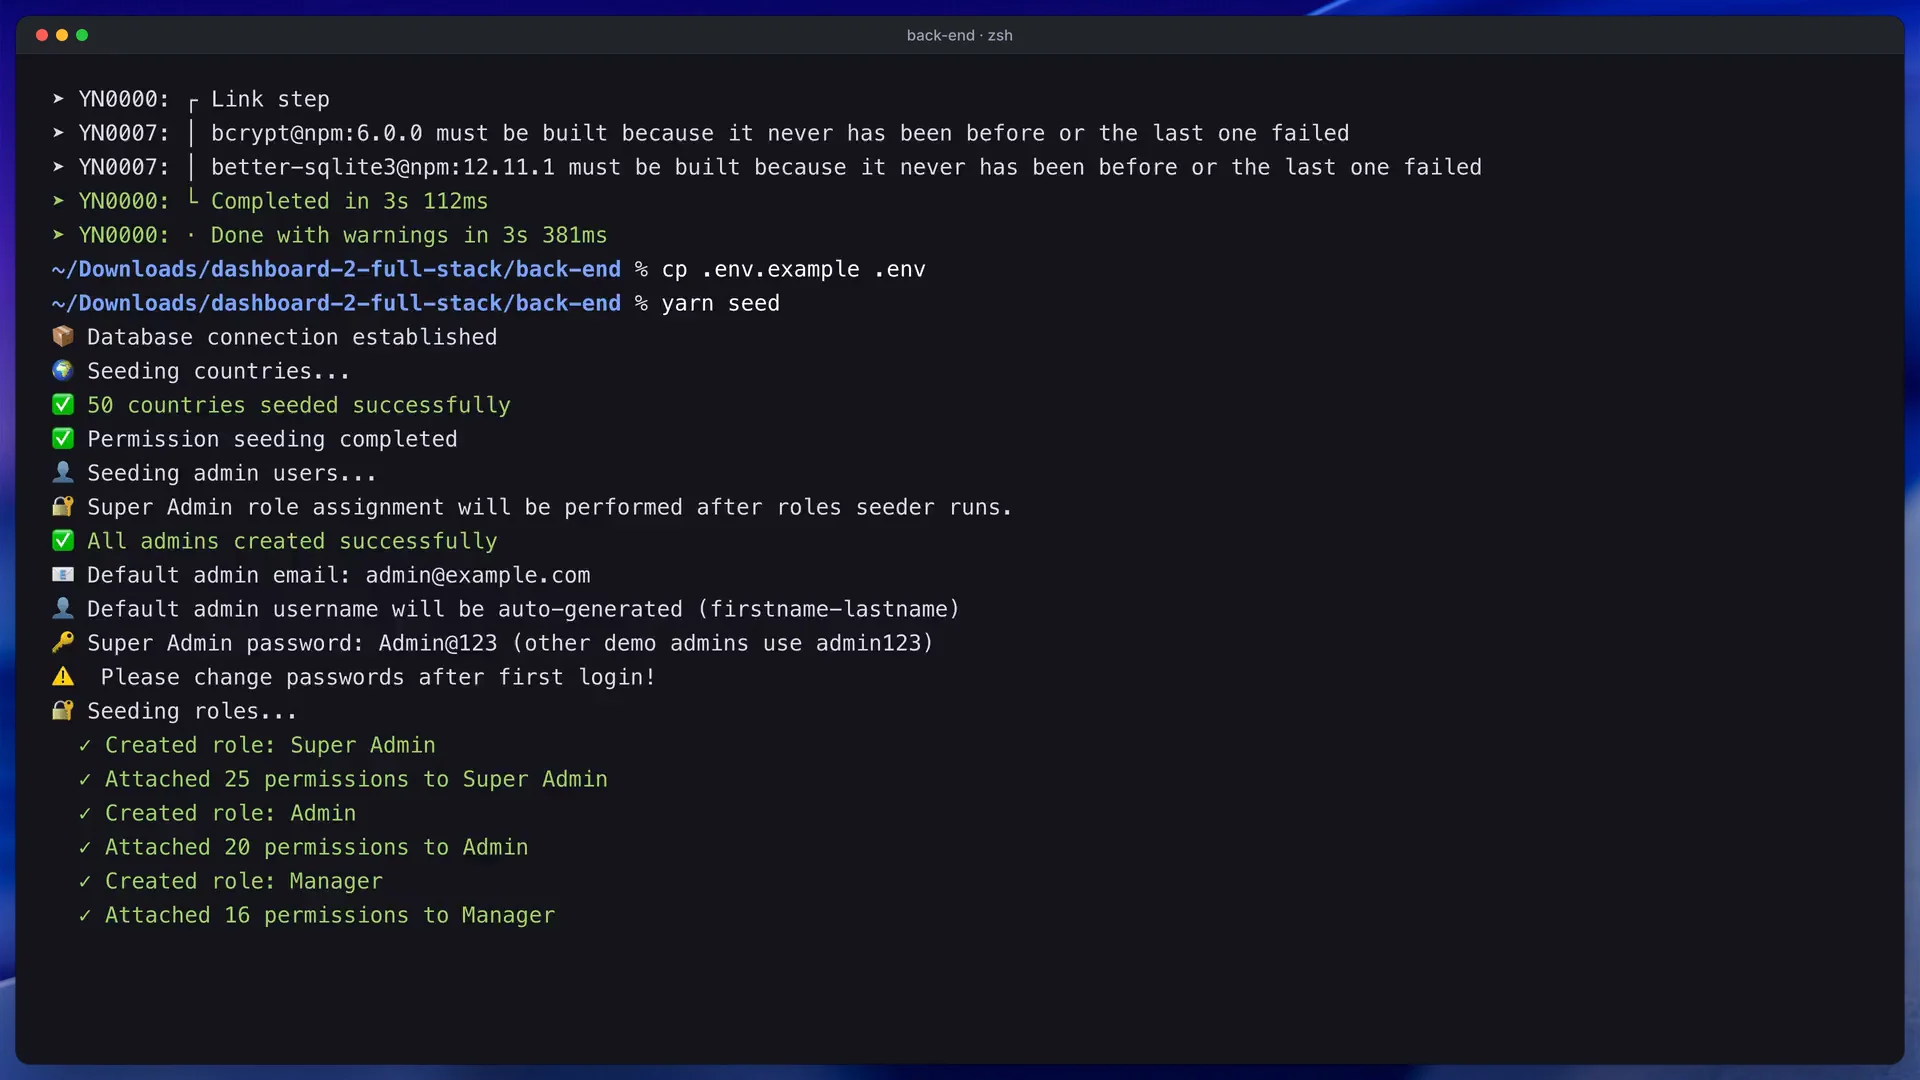
Look at the first terminal, which runs the API.
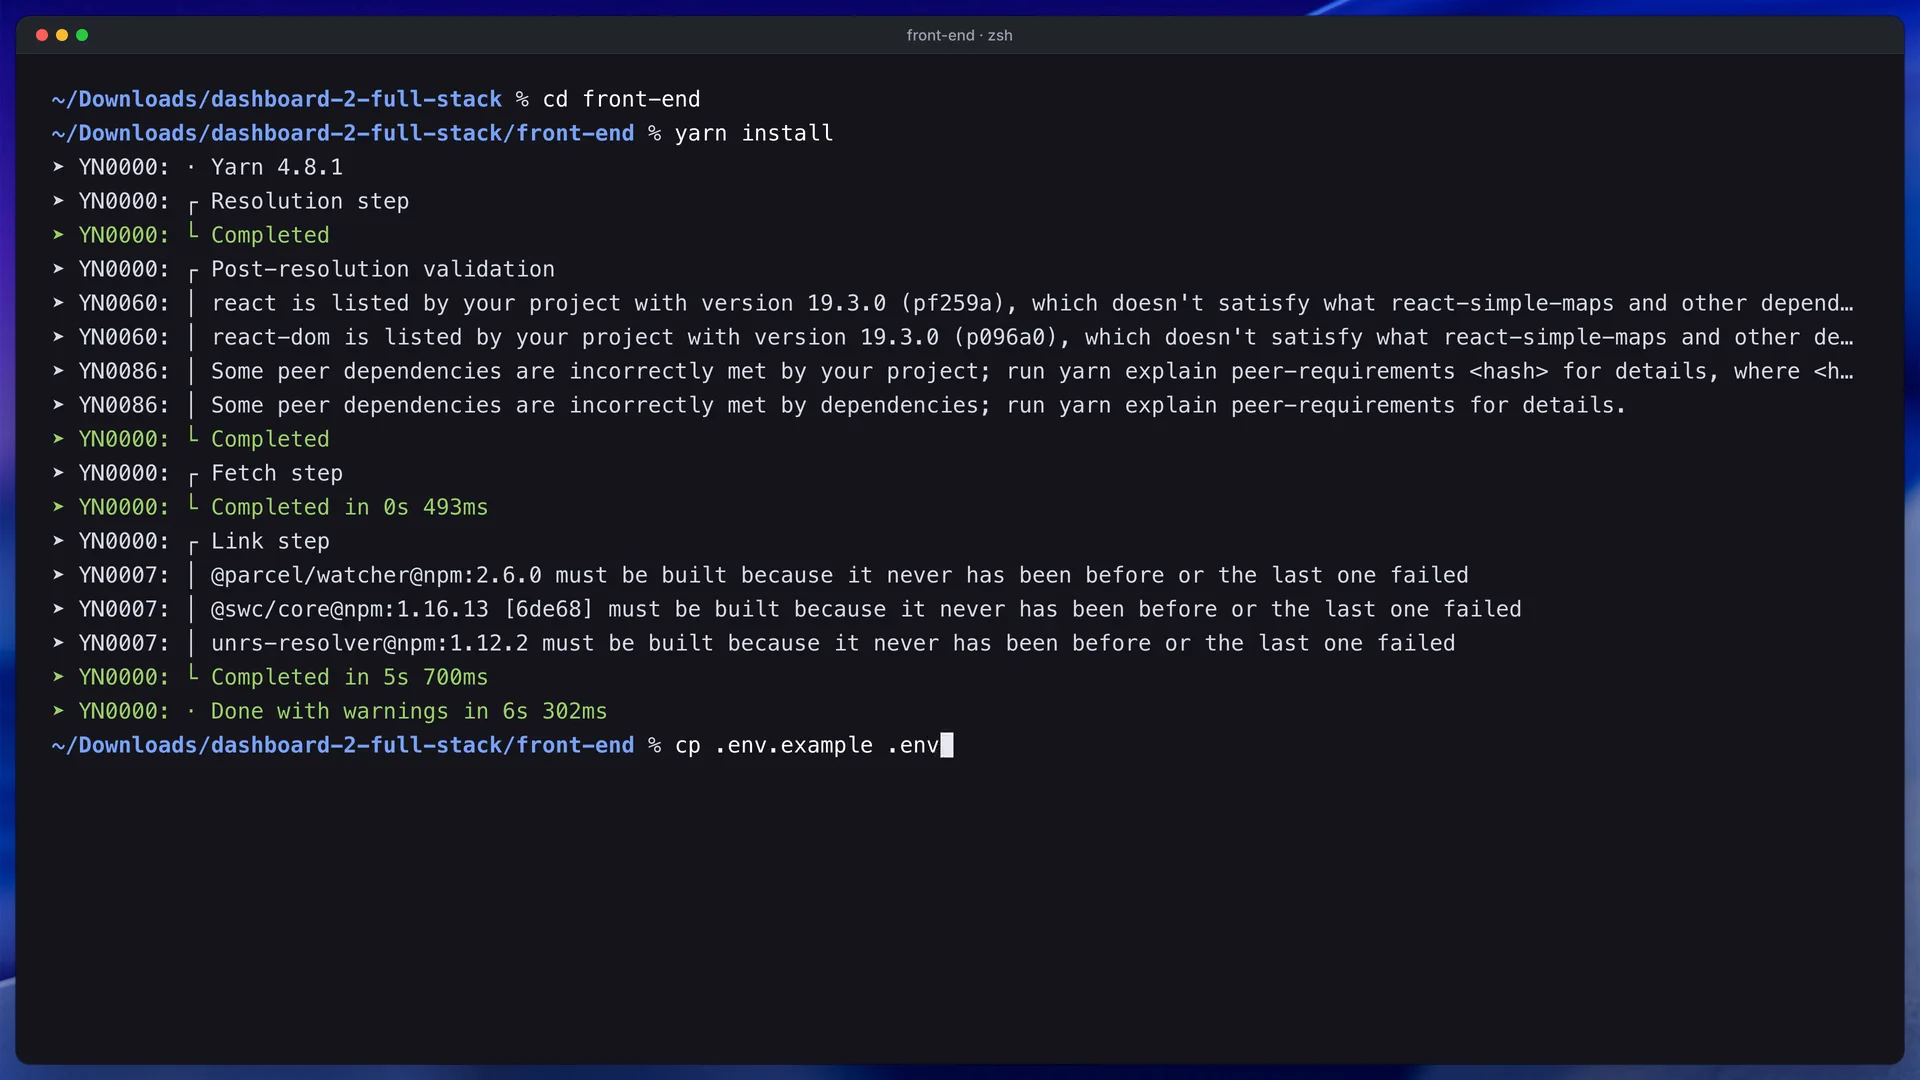
Look at the second terminal, which runs the dashboard against the API from the first.
The same approach works for the single-app packages.
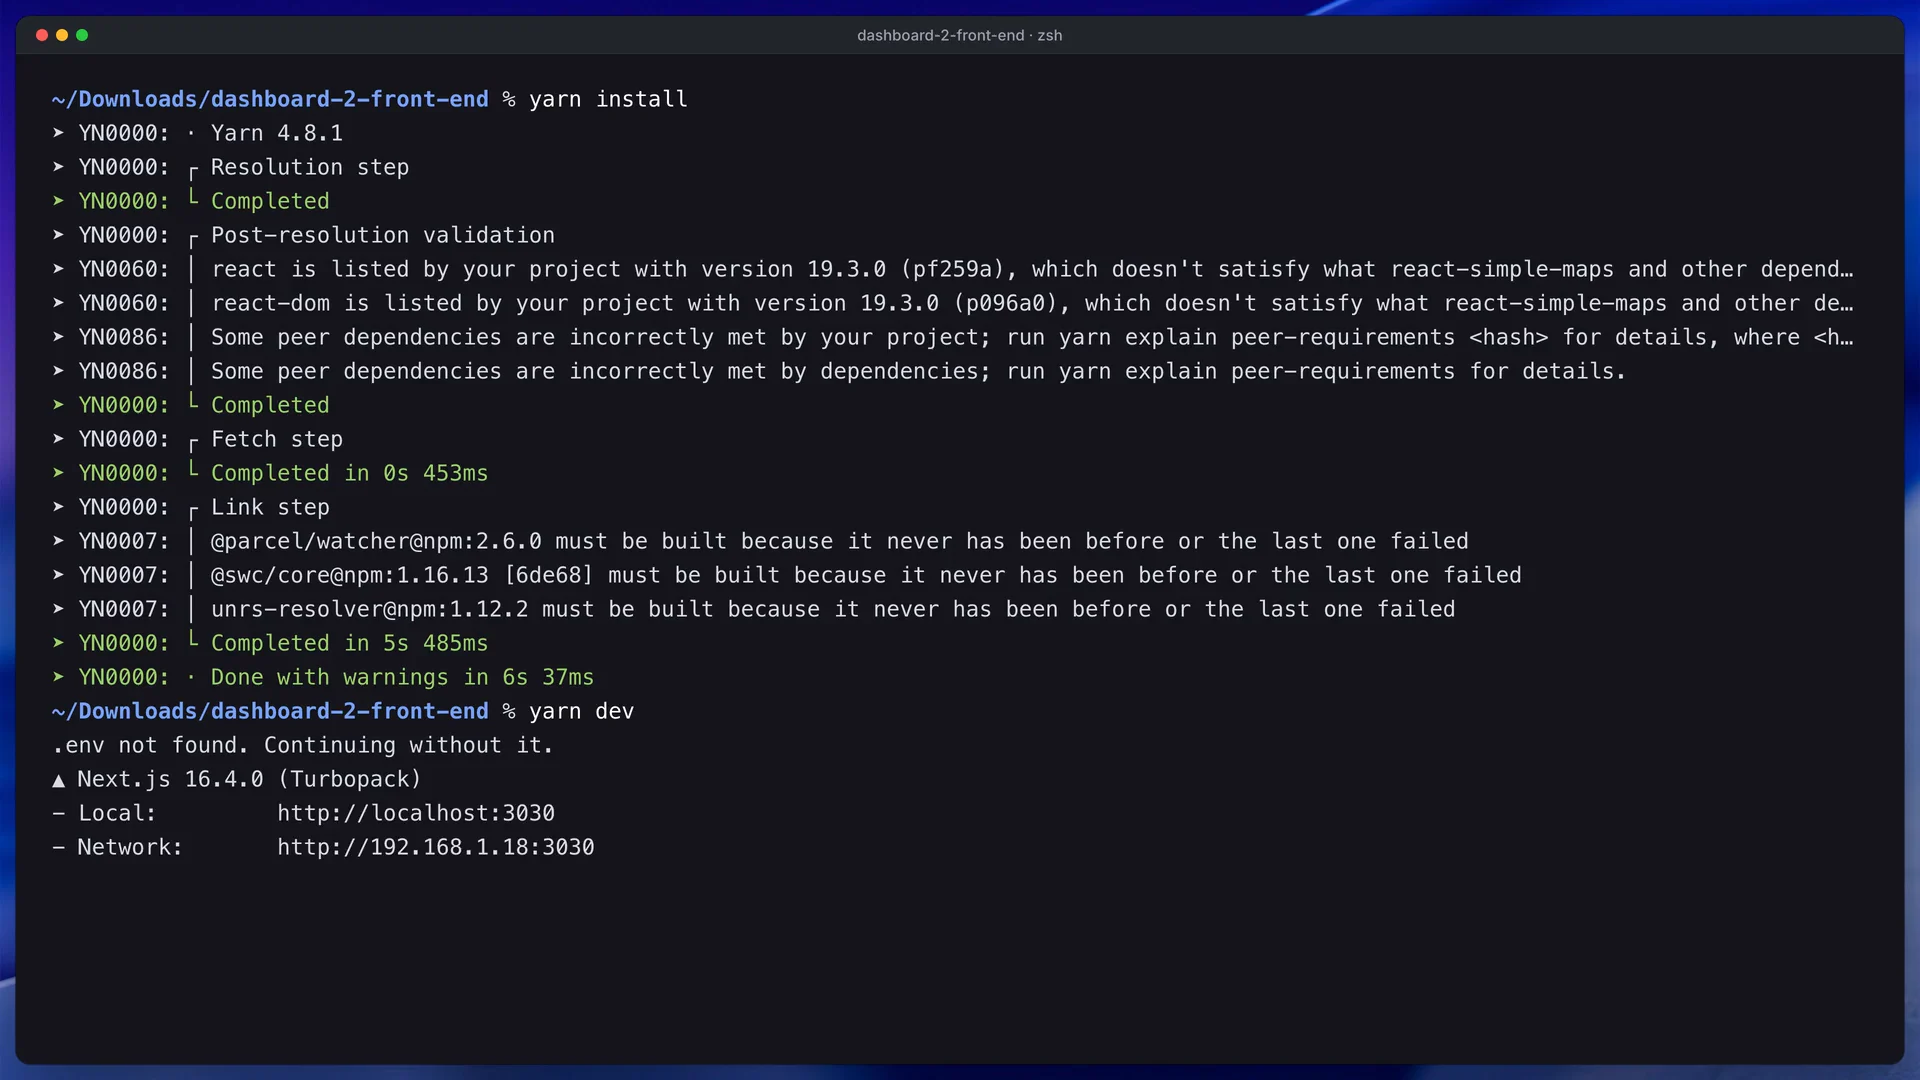
Look at how little is needed here: no .env file means the mock server answers.
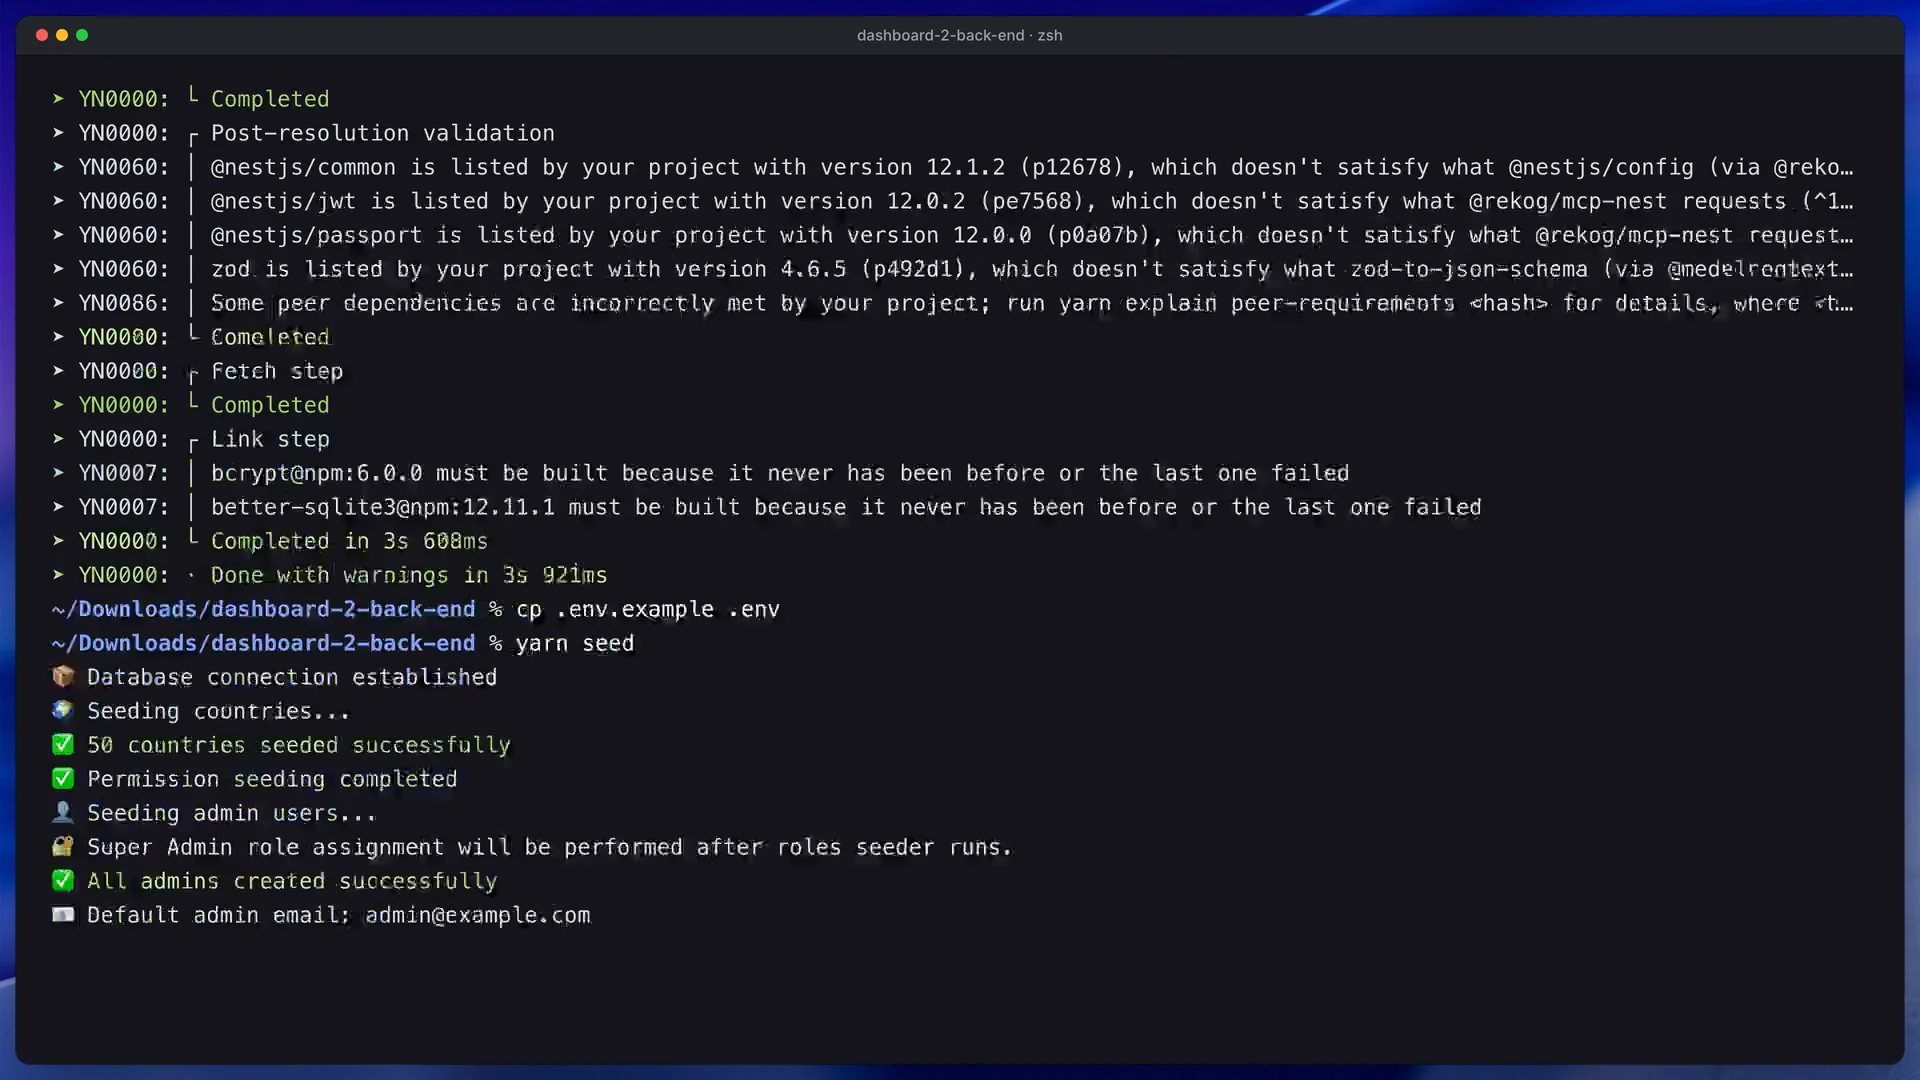
Look at the API terminal staying open while you use it.
What usually goes wrong: a Node.js older than 22.9, which makes yarn dev fail on reading .env; a Yarn that answers with version 1.22 because Corepack is off; and a dashboard that shows sample data even though you meant to use your API, because the API address was missing when it was built.
4. Explore the sample data before you change anything
The seed loads a small company's worth of records: a dozen admins, five roles carrying 25 permissions, 15 users, 15 projects, 10 tasks and 13 app settings, plus some deleted users and projects to practise restoring. Click through the sidebar from top to bottom, ending on the page that lists every UI component.
Look at how the sidebar groups the screens, since you will rename and prune this menu later.
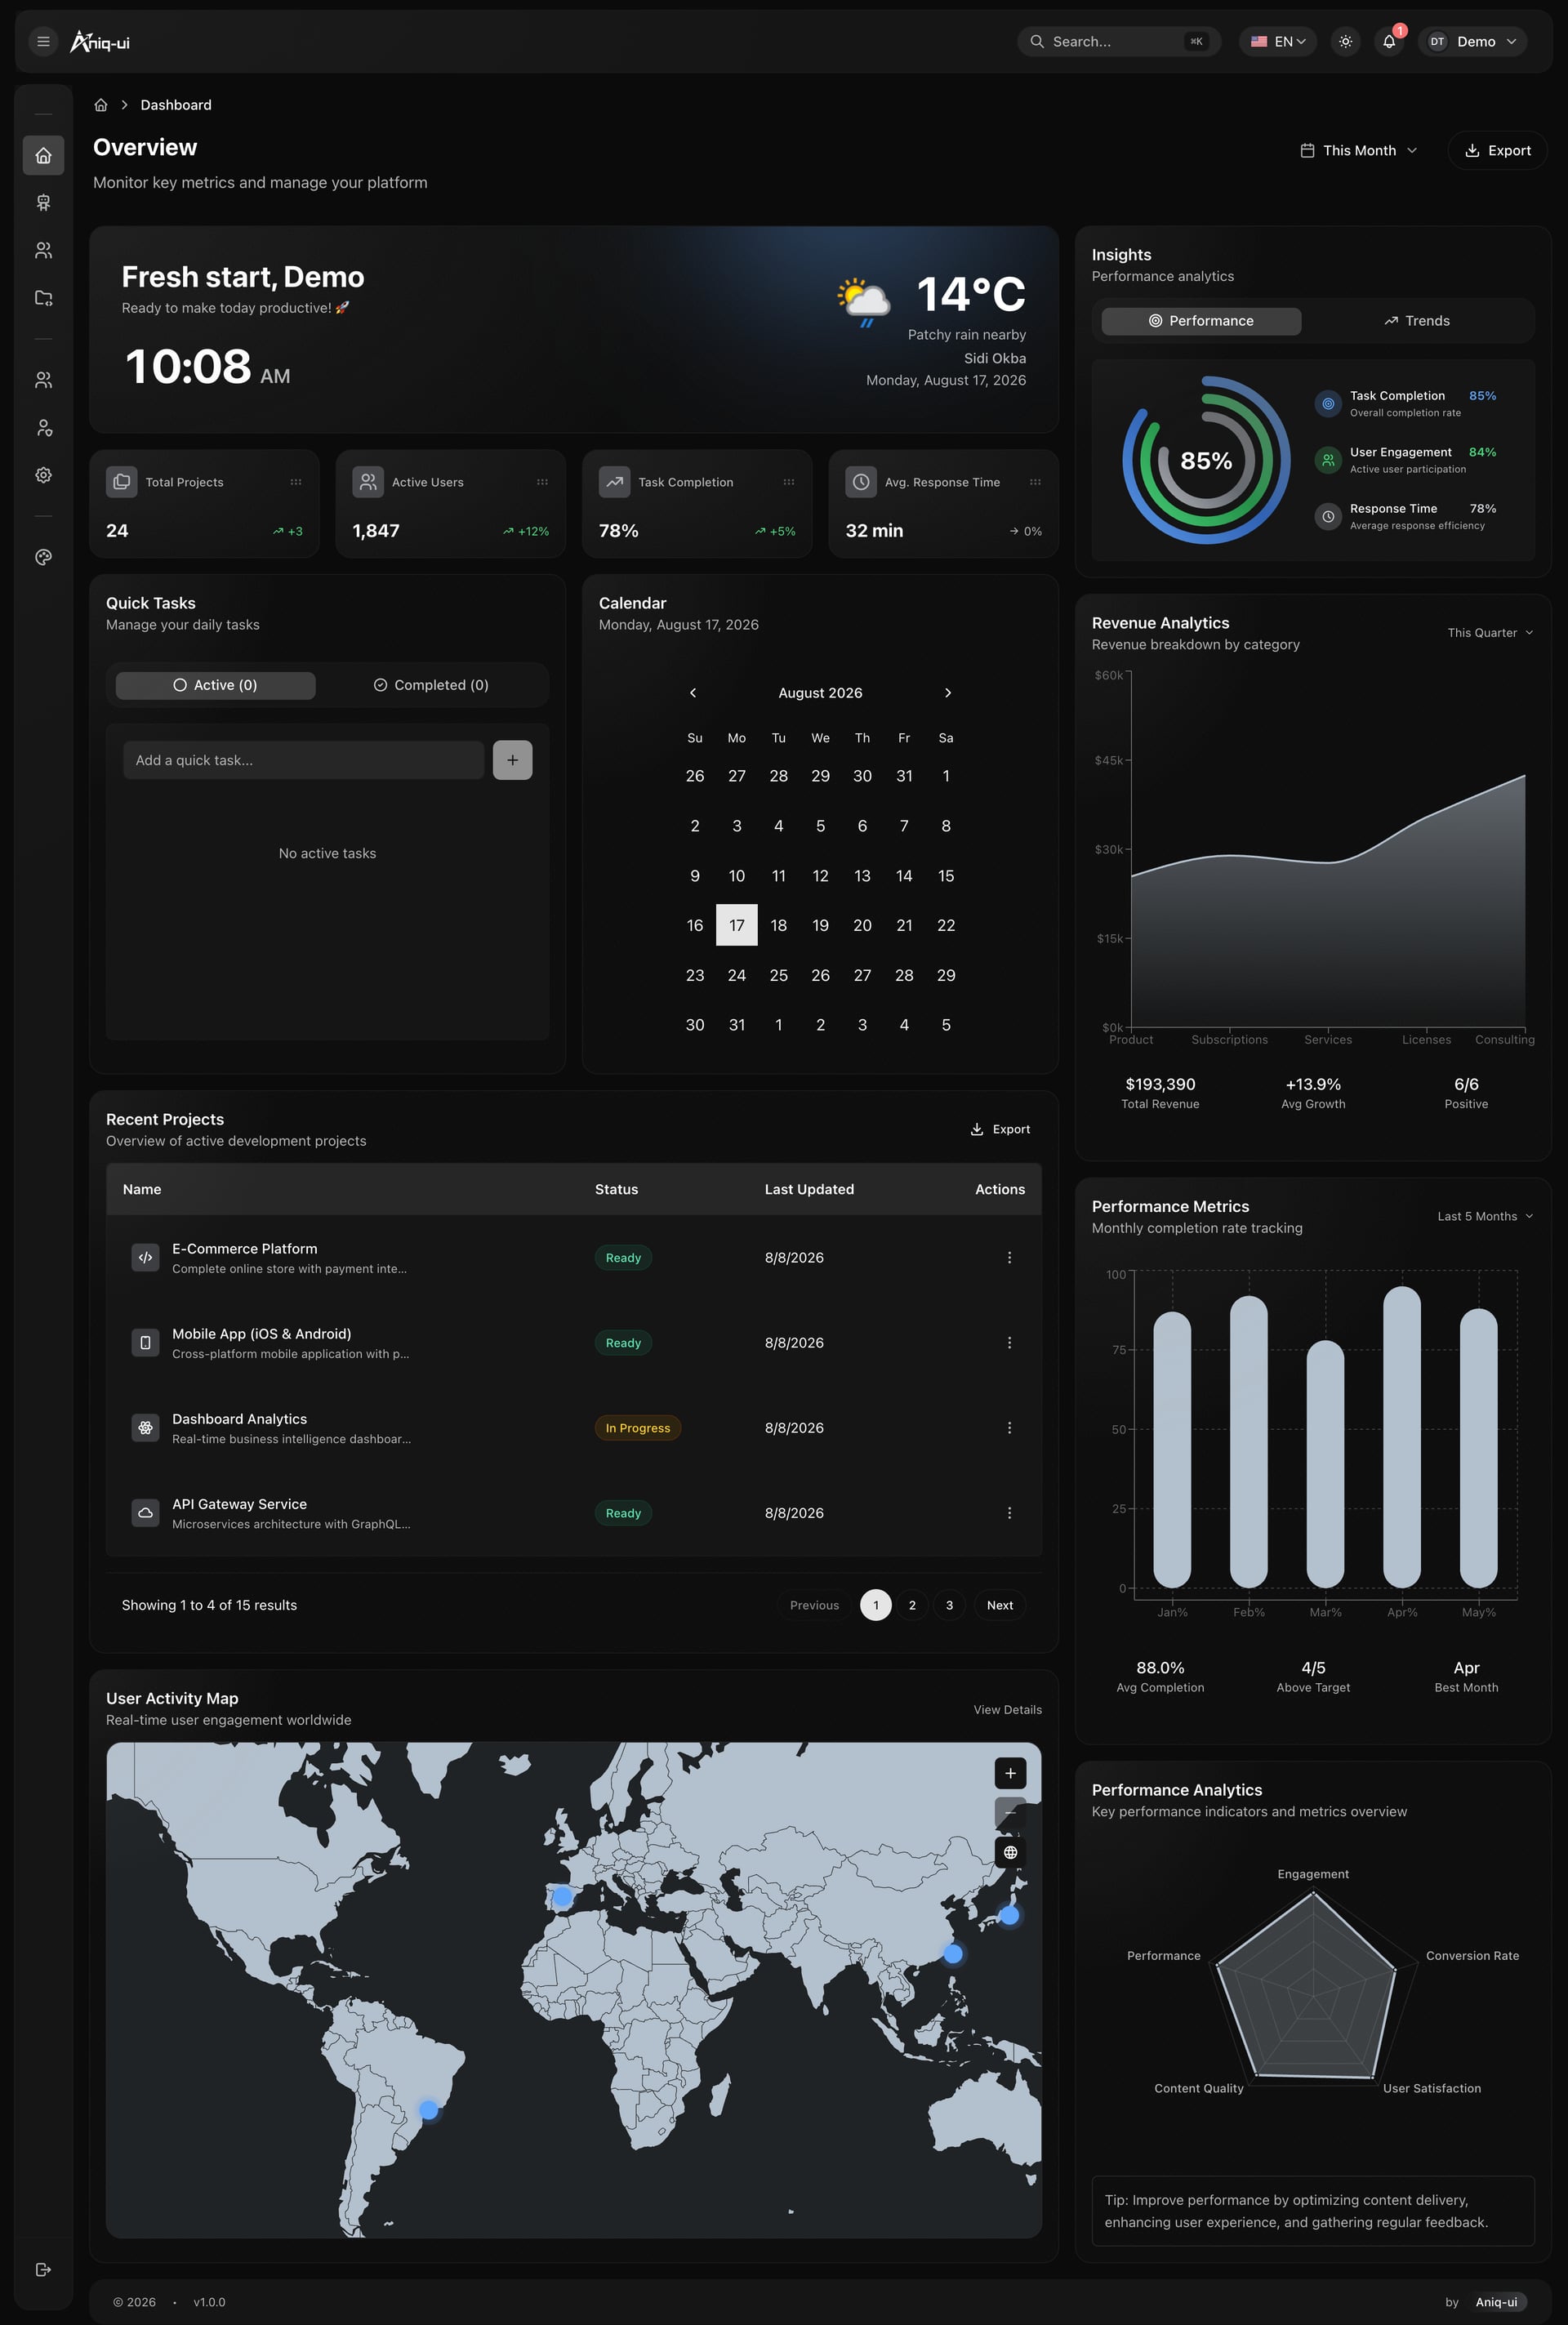
Look at the top of the overview: key figures, charts, a calendar and quick tasks share one screen, and the widgets can be rearranged.
Then sign out and sign in as john.smith@admin.com with the password admin123. This account has the Viewer role. It can read every list but cannot create, edit or delete anything, and it cannot open the assistant. Seeing that difference early tells you how the permission system behaves, which matters for step 6.
What to check: you can explain, in one sentence each, what Super Admin and Viewer can do. What usually goes wrong: people edit sample records first and then forget which data is real. Keep the sample data untouched until you are ready to replace it in bulk.
5. Put the agency's name on it
All branding sits in the dashboard folder (front-end in the Full Stack package). Run yarn dev there while you edit and the page reloads on every save. Four places matter most:
src/config/brand.config.tsholdsBRAND_CONFIG: the name, the company, the page metadata and the installed-app details, in English and Arabic.public/assets/images/logo-for-lightmode.pngandlogo-for-darkmode.pngare the two logos. Replace the files and keep the names.src/styles/theme-variables.cssdefines every colour once for light and once for dark. The brand colour is--primaryColor.messages/<namespace>/en.jsonandar.jsonhold every word on screen. Edit both languages together.
Larkspur changes the name, swaps both logos and picks one new primary colour. That is enough for the dashboard to feel like theirs. Components read colours through variables such as bg-[var(--surface)], so any component you add later keeps both themes if it does the same.
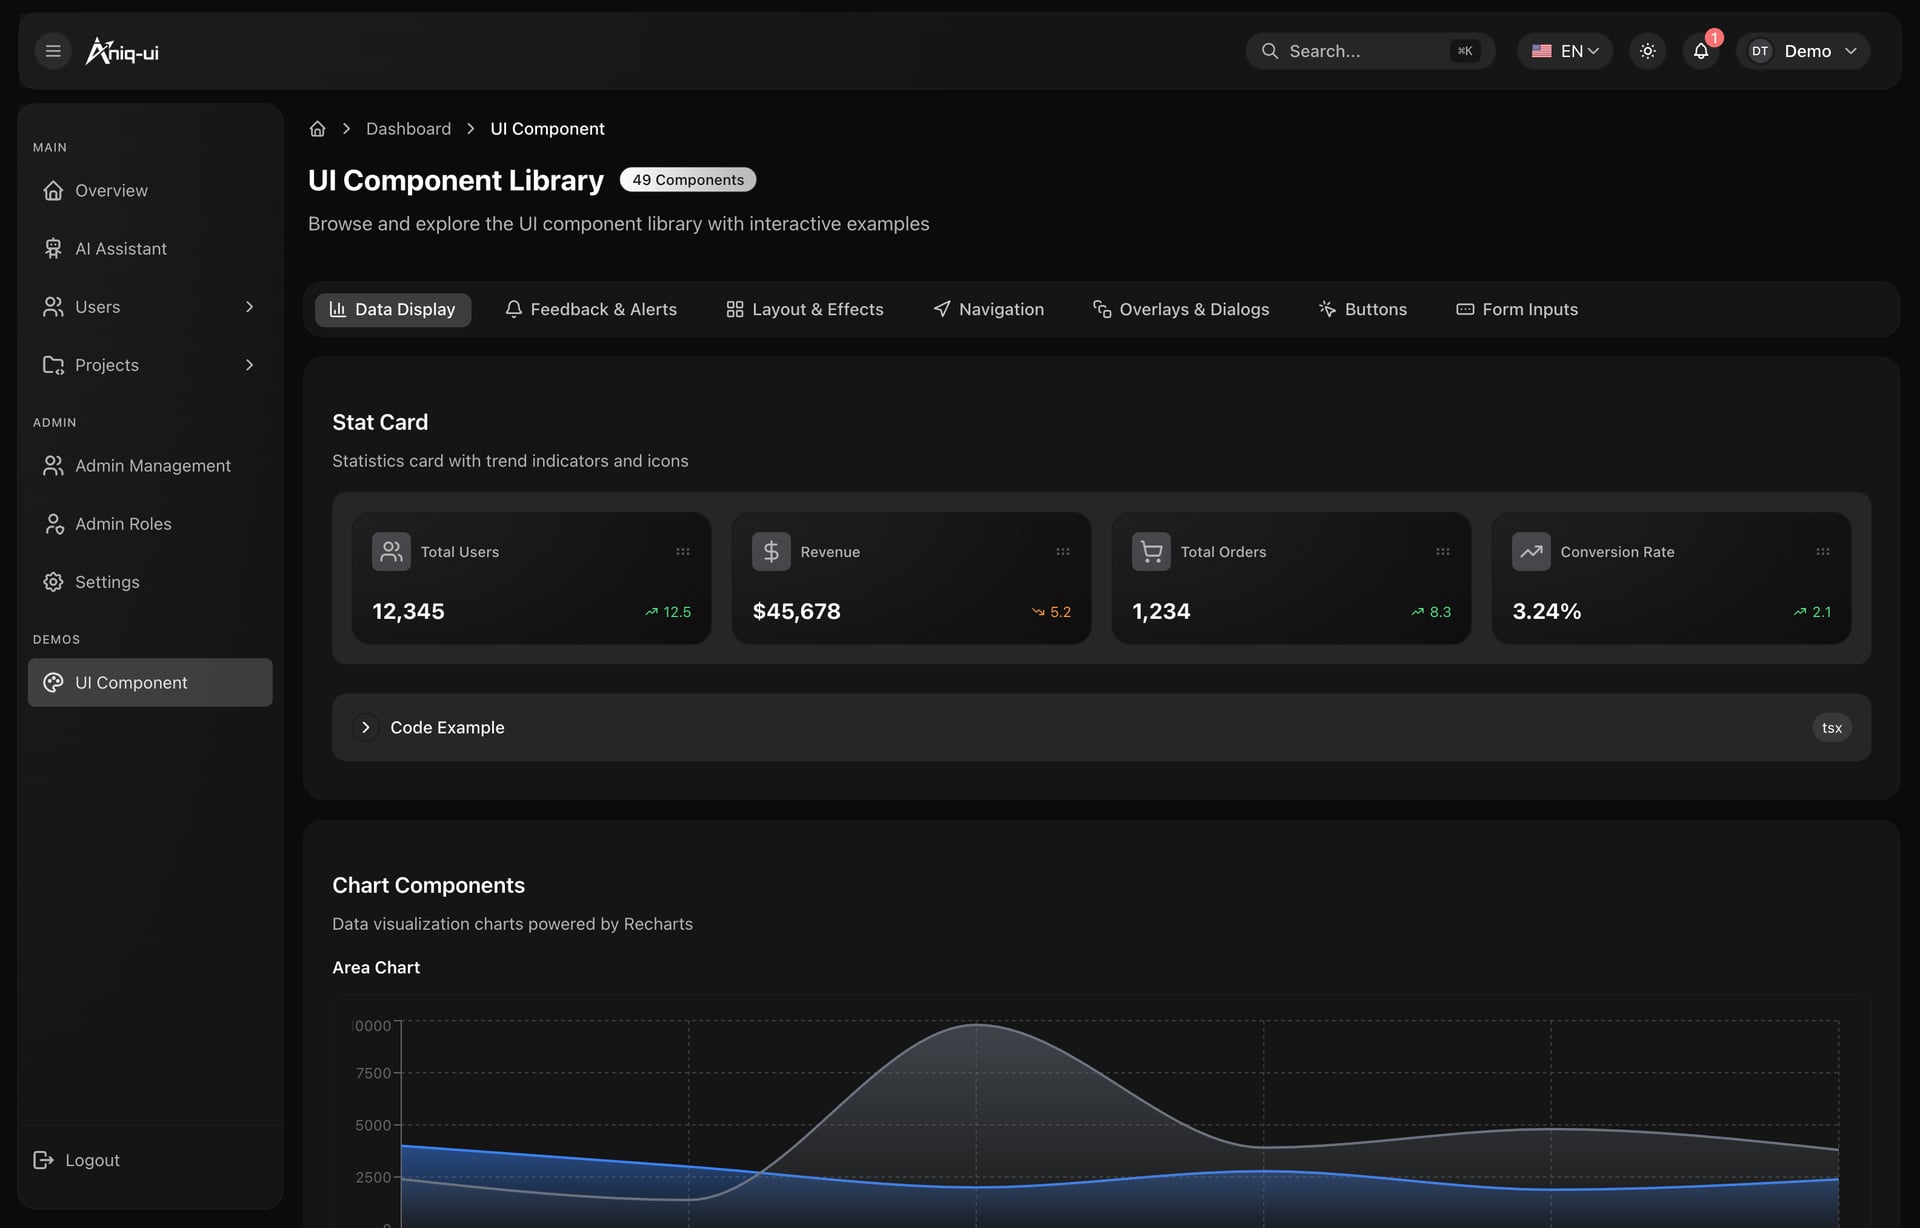
Look at the component page: it is the quickest way to see your new colour on every kind of control at once.
What to check: switch between light and dark in the header, then open the component page in both. What usually goes wrong: a logo with a baked-in background colour that looks wrong in one theme. Export both logos with transparent backgrounds.
6. Set up staff and roles
The seed ships five roles: Super Admin, Admin, Manager, Editor and Viewer. One person can carry more than one role, and they receive the combined permissions of all of them. Permissions are named module.action, for example users.view, projects.edit or settings.edit, and there are 25 of them across admins, roles, users, projects, settings and the assistant.
Larkspur maps its team like this: the owner stays Super Admin, the two project leads become Manager, developers become Editor, and contractors become Viewer. Do it in three passes:
- Open Admin Roles and read what each role grants. Rename or trim until the roles match the paper plan.
- Open Admin Management and create each real person, then assign their roles.
- Sign in as one person per role and try the actions that role should and should not have.
If you change a role while someone is signed in, their menus and buttons update without a reload, because the API tells their dashboard over a WebSocket.
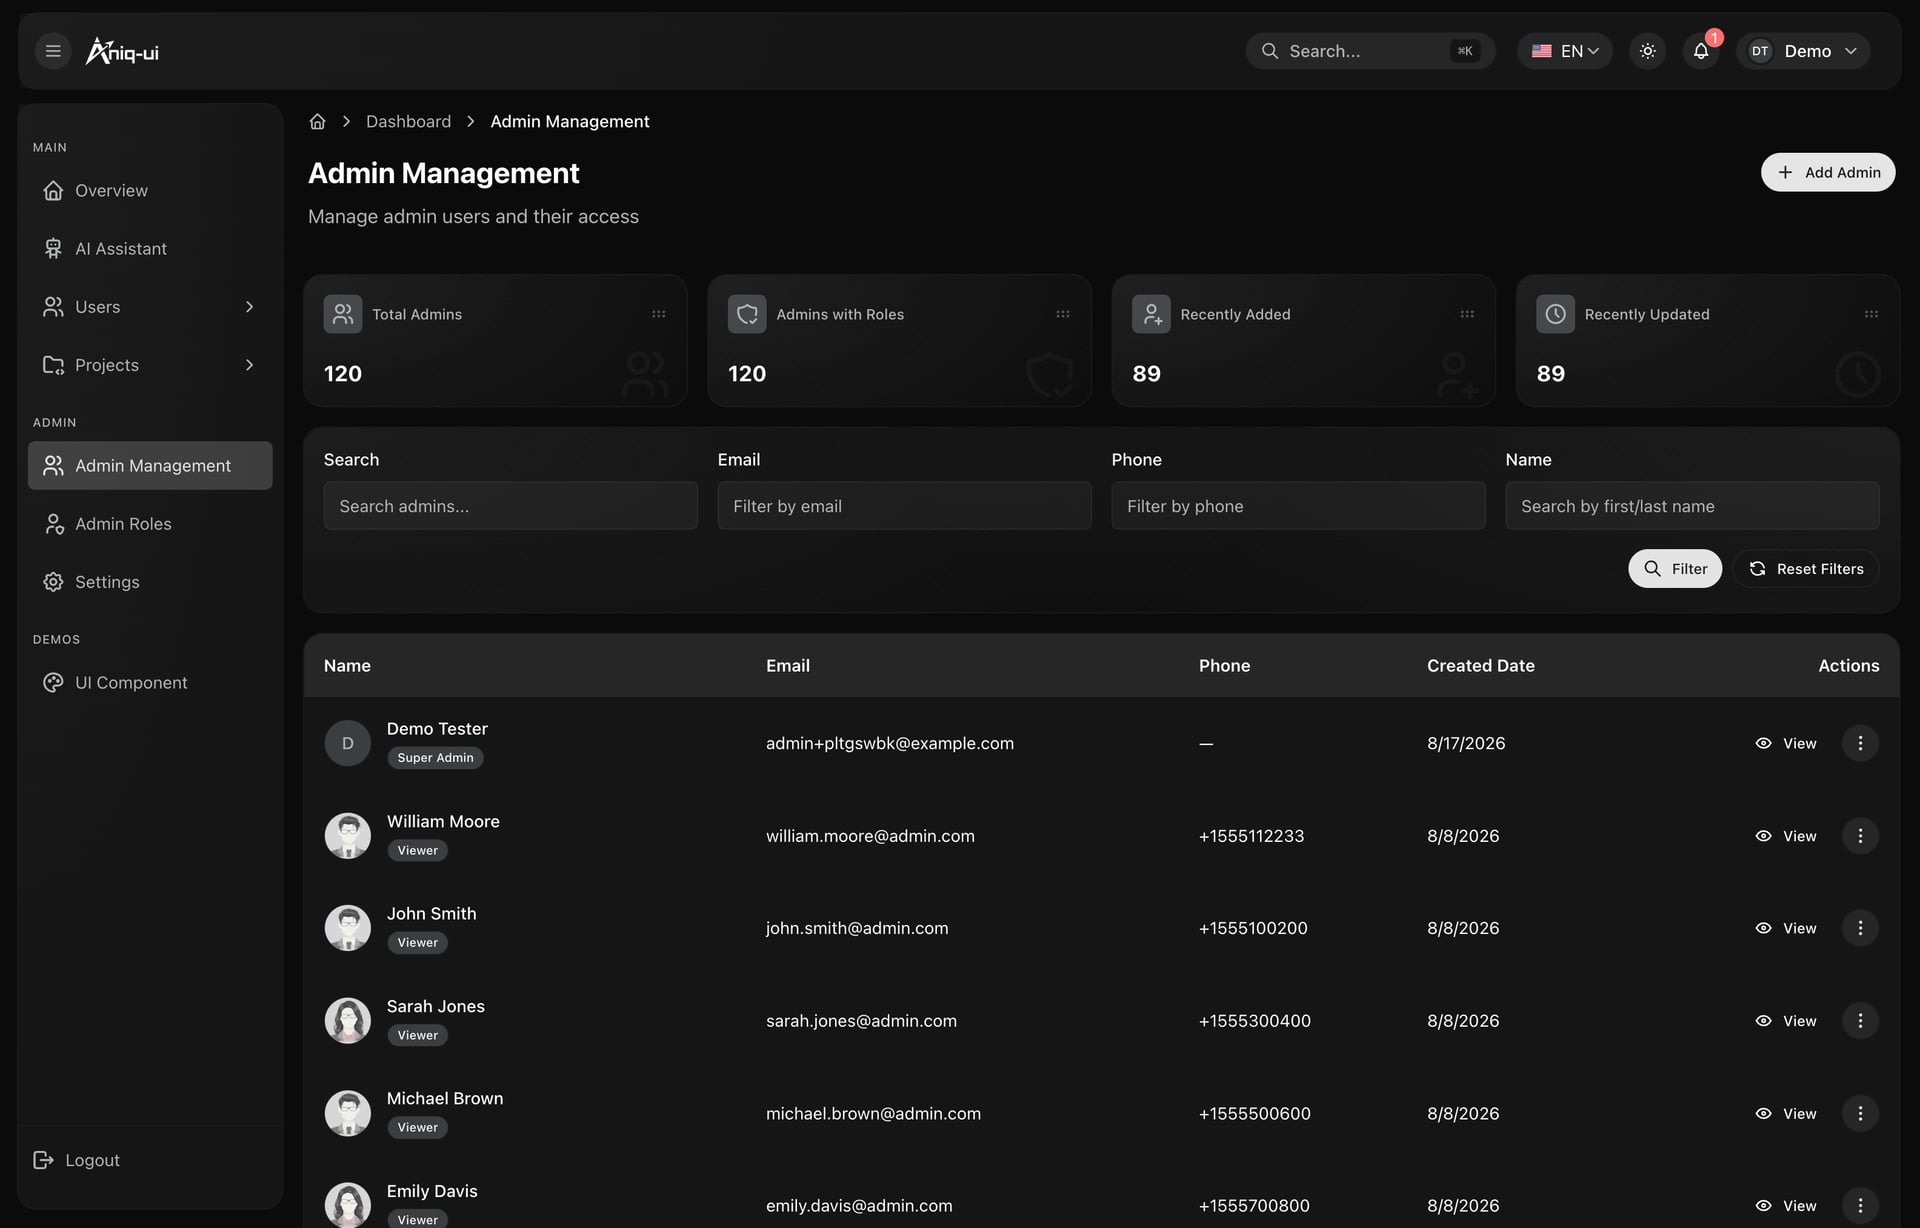
Look at the role chips on each account: they show at a glance who holds which role.
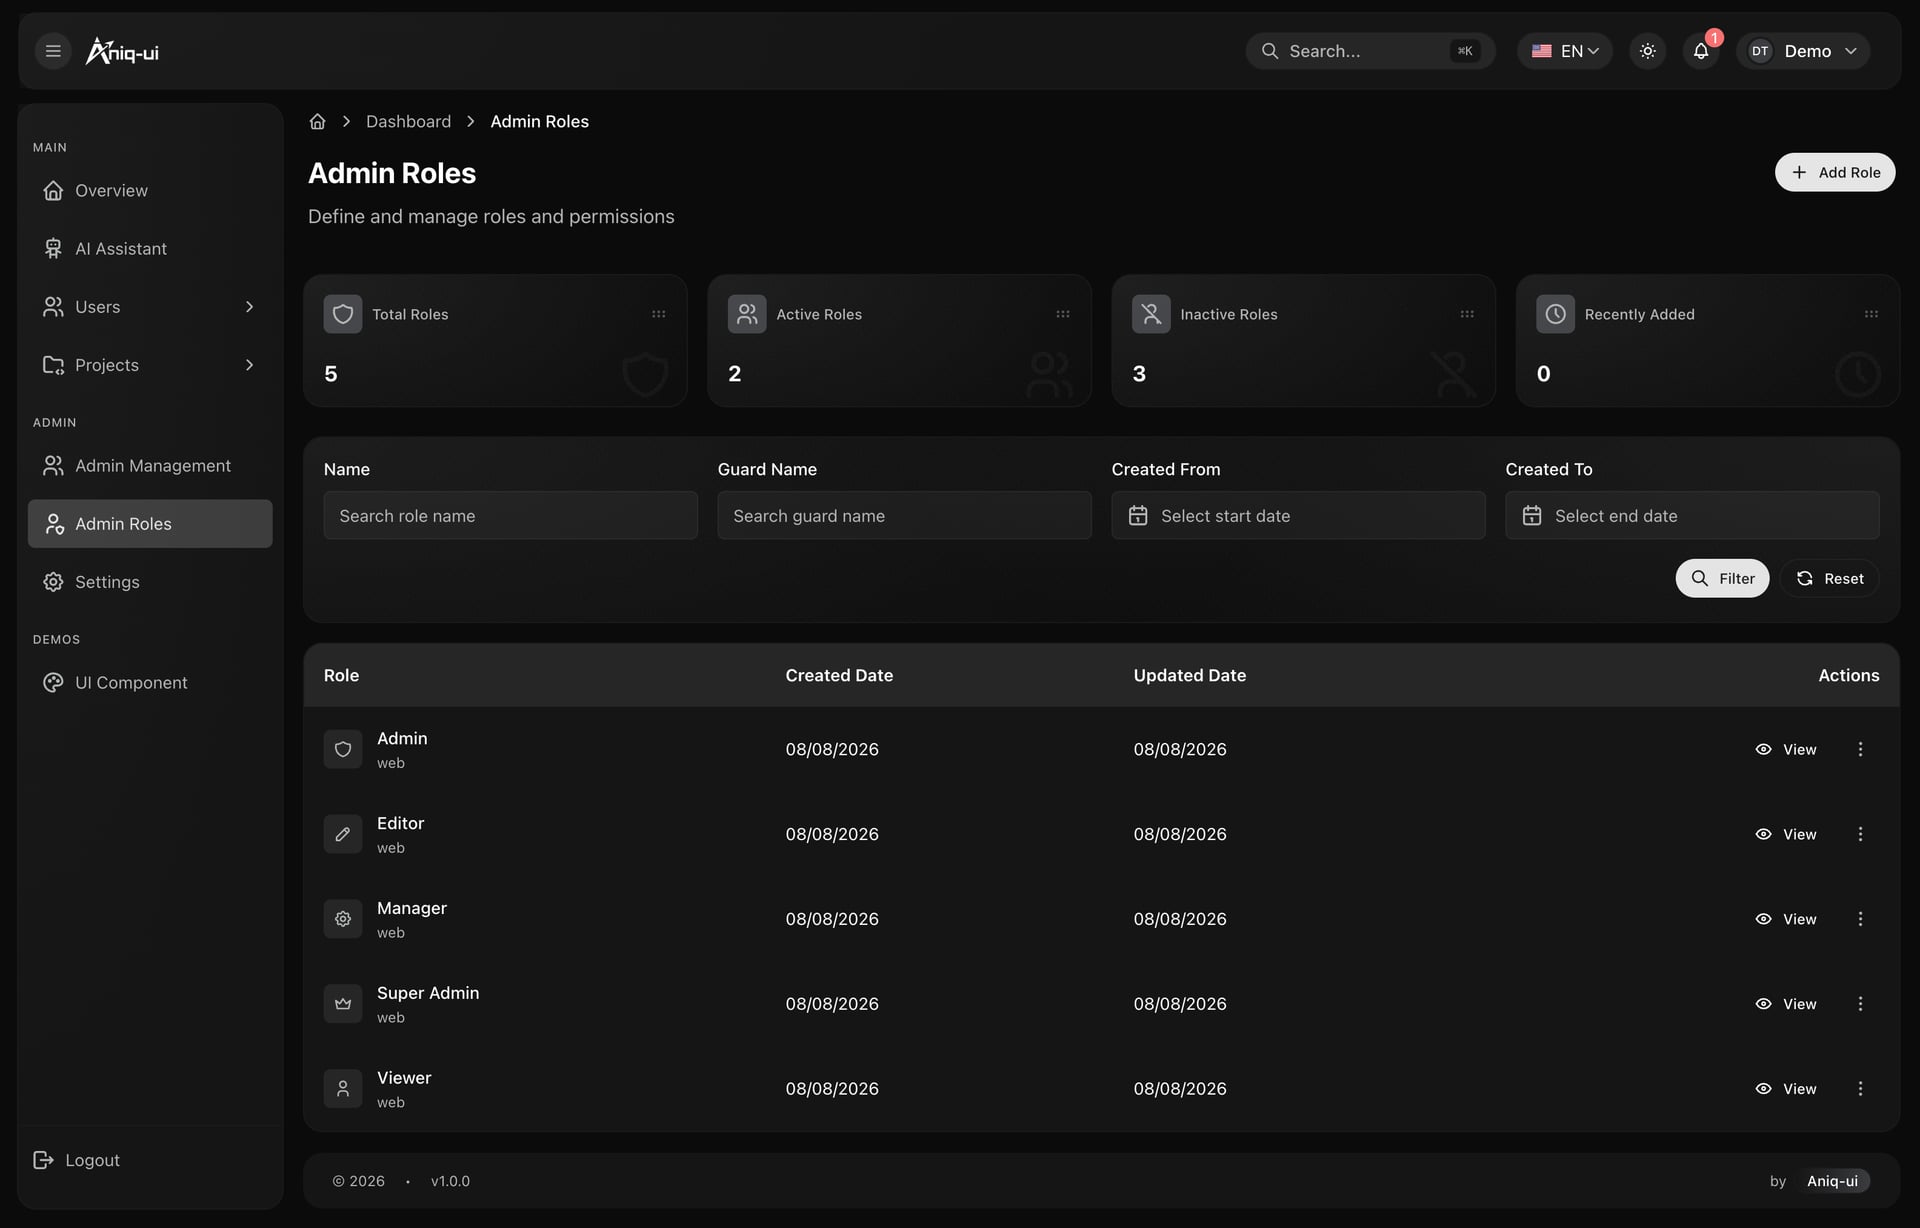
Look at how permissions are grouped by module, which makes it easy to grant "view" without "edit".
Before anything else, change the passwords of the sample admins under Settings, Security, or delete those accounts. The seed creates them with passwords printed in the public documentation, and the template's guides warn about this more than once for good reason.
What usually goes wrong: deleting the Super Admin before another admin can manage roles, or giving the Admin role to everyone because it is easier. Start strict and loosen when someone asks.
7. Load projects and client accounts
Open Projects and replace the sample rows with Larkspur's real work. A project carries a name and description in English and Arabic, a status (in-progress, ready or blocked), an environment, a version and an optional picture. Deleting is a soft delete: deleted projects move to their own screen and can be restored.
Users work the same way. You can narrow the list by username, email, phone, name or join date, and the top of the page counts verified, unverified and deleted accounts. For Larkspur, that is the screen for client staff who got an invitation and never confirmed it. The resend-verification route answers success but sends no mail, so connect your own mail service before you rely on it.
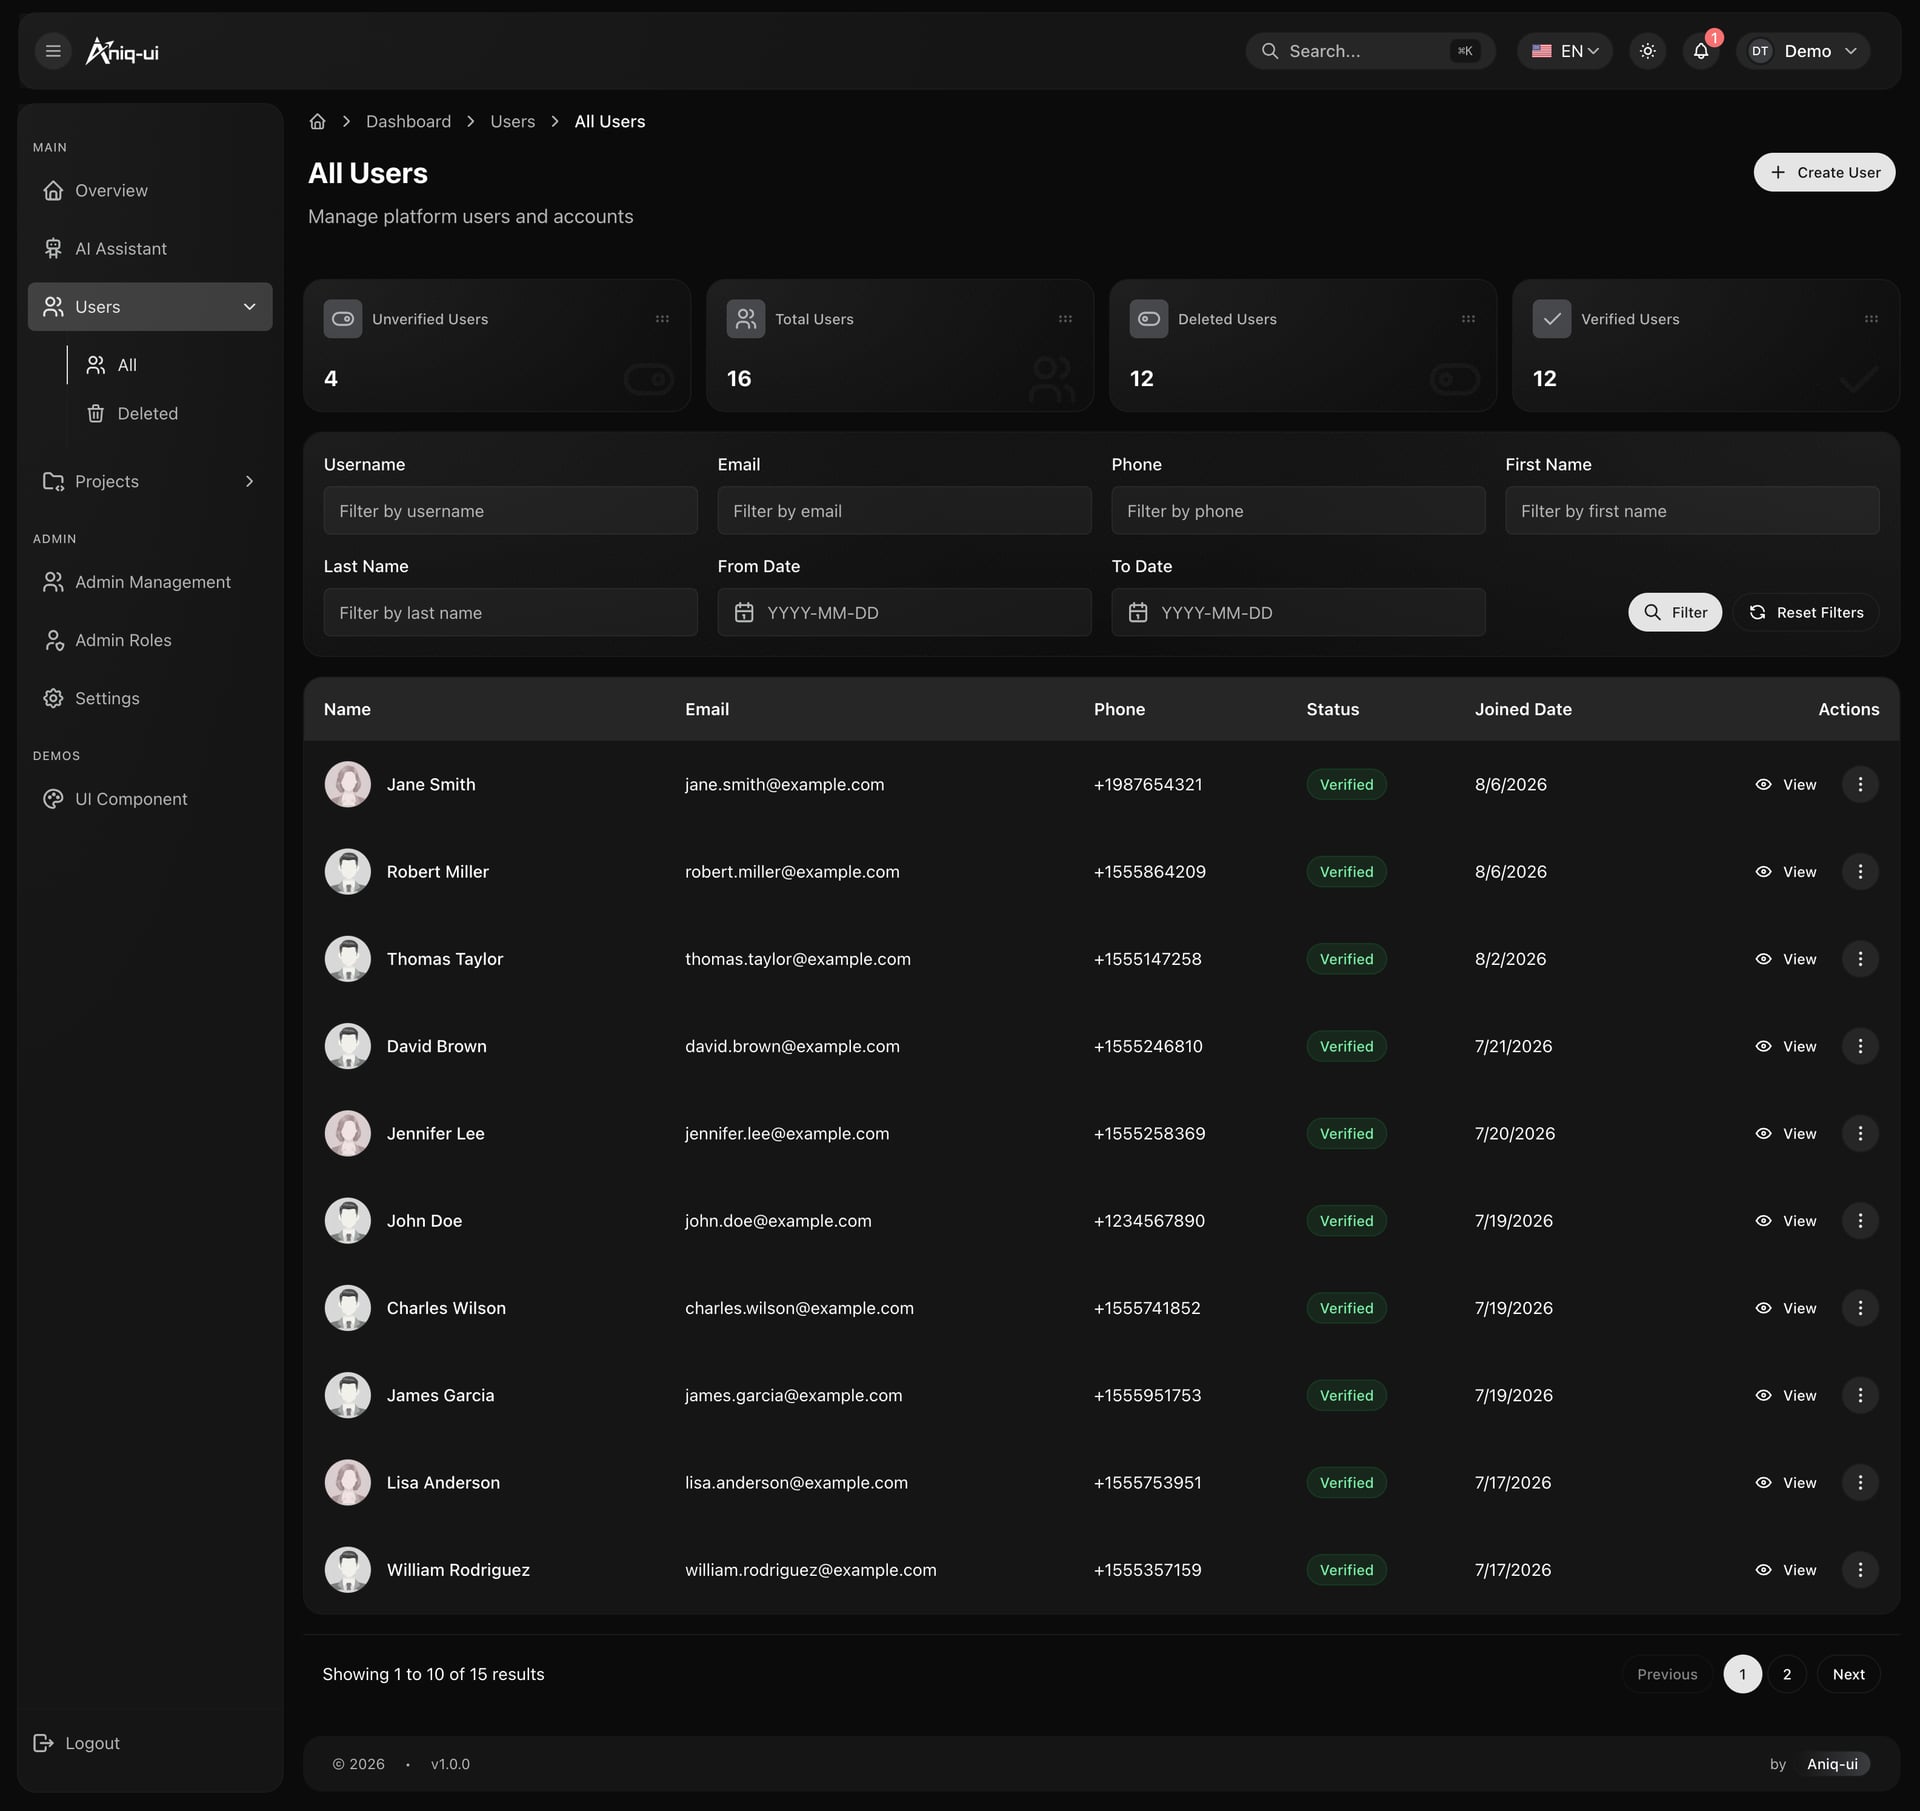
Look at the counts above the table and at the status chips on each row.
If your own product has other records, the API is plain REST under /api, so you can add modules beside the existing ones. Sign in with POST /api/auth/login to get the token every other call needs, and send it as a bearer token. Lists take page and page_count, capped at 100 per page.
What to check: create a project in English and Arabic, reload, and confirm both names appear when you switch language. What usually goes wrong: filling only the English name, which leaves the Arabic list with an empty label.
8. Turn on the AI assistant
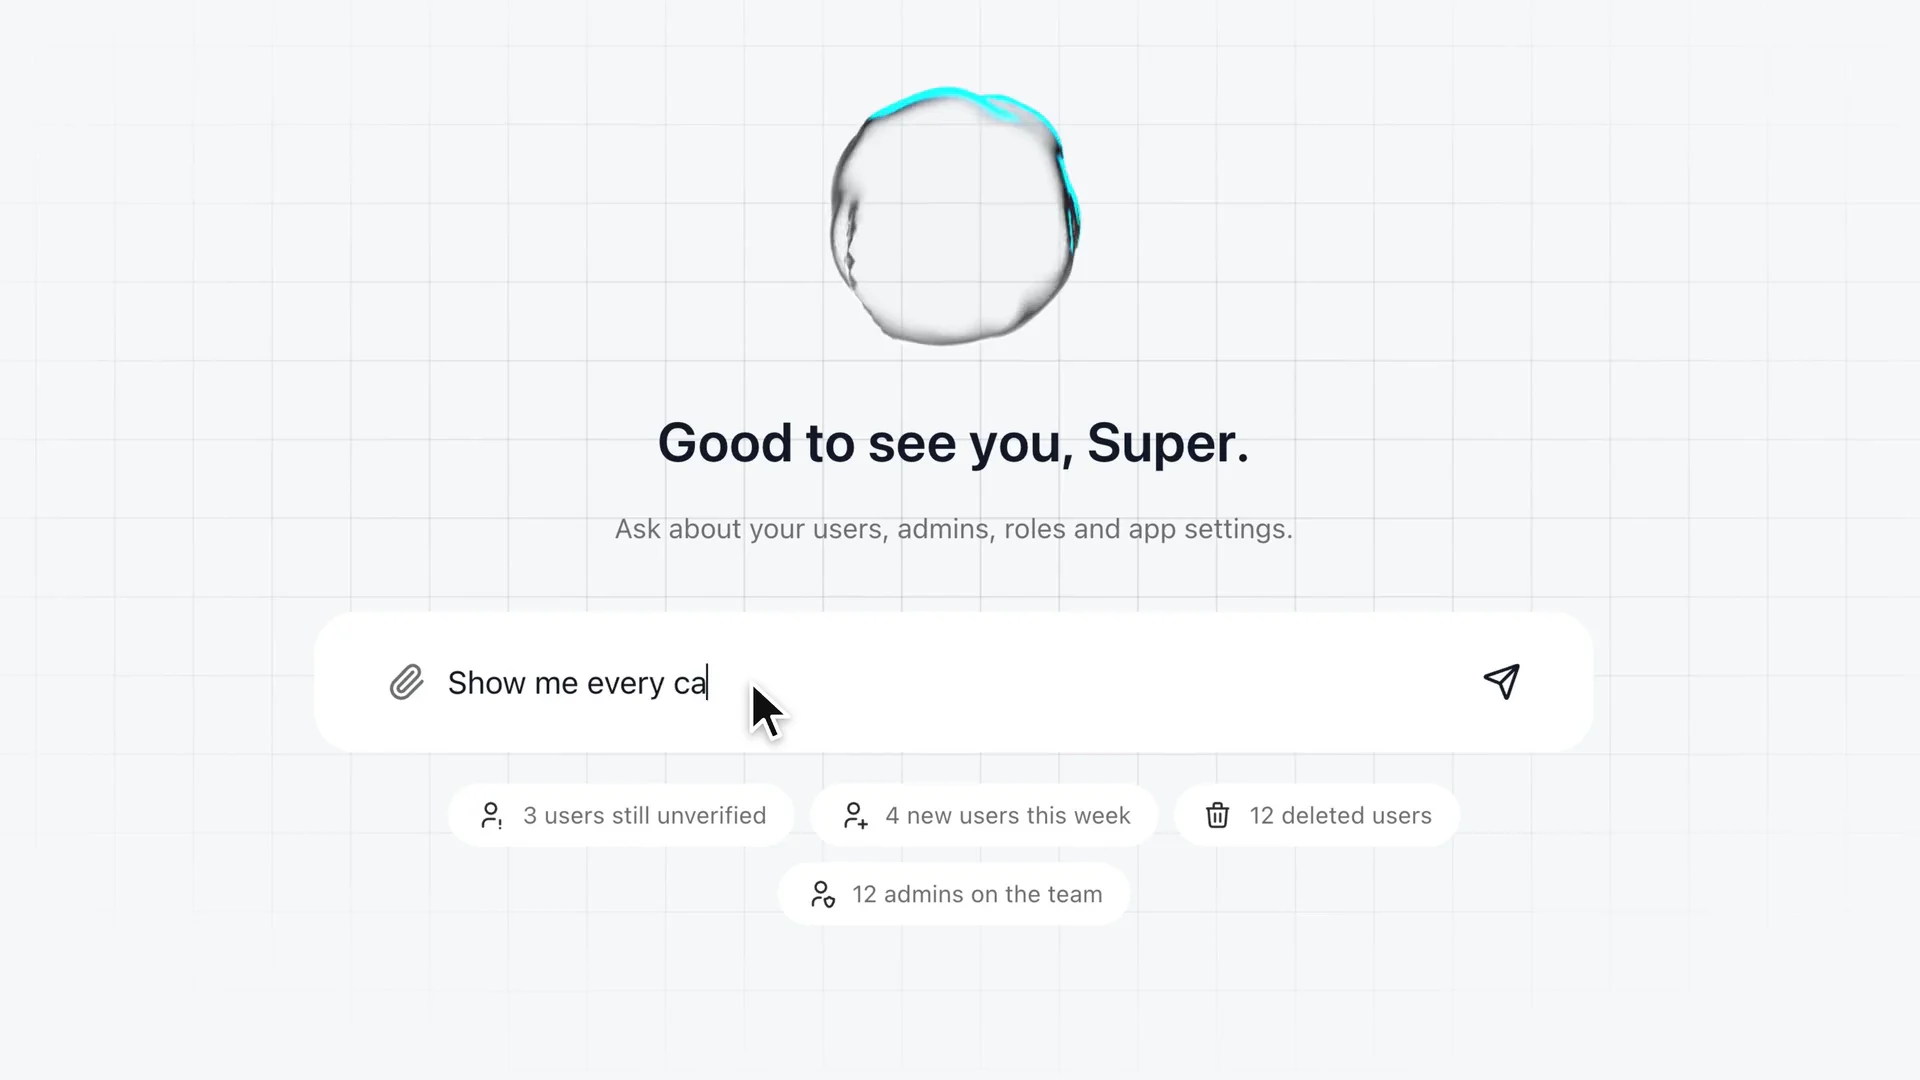
The assistant is its own screen. You type a question in English or Arabic and the answer is built from the dashboard's data, drawn with the same stat cards, tables, lists, donuts and charts the rest of the panel uses. It can also act: add, change, remove or bring back users, and adjust app settings. It does this only inside the permissions of the person asking.
It runs on Google Gemini, OpenAI or DeepSeek, chosen in a model picker. Conversations are saved per admin in a history sidebar. You have two ways to supply a key:
- Put the provider's key in
back-end/.envand restart the API (with Docker Compose, rundocker compose upagain). Then everyone with access uses your key. - Leave the server without a key. The assistant then asks each person for their own, and it stays in their browser.
Larkspur starts with the second option, so nobody's usage lands on the agency's bill by accident. The docs say Gemini works with free keys, while OpenAI needs billing enabled on the key. A free key can run out of quota, and the assistant says so; pick another model or wait.
Control access with the ai_chat.use permission. Because the assistant can write, give it only to roles you would trust with those writes. Contractors on the Viewer role get none.
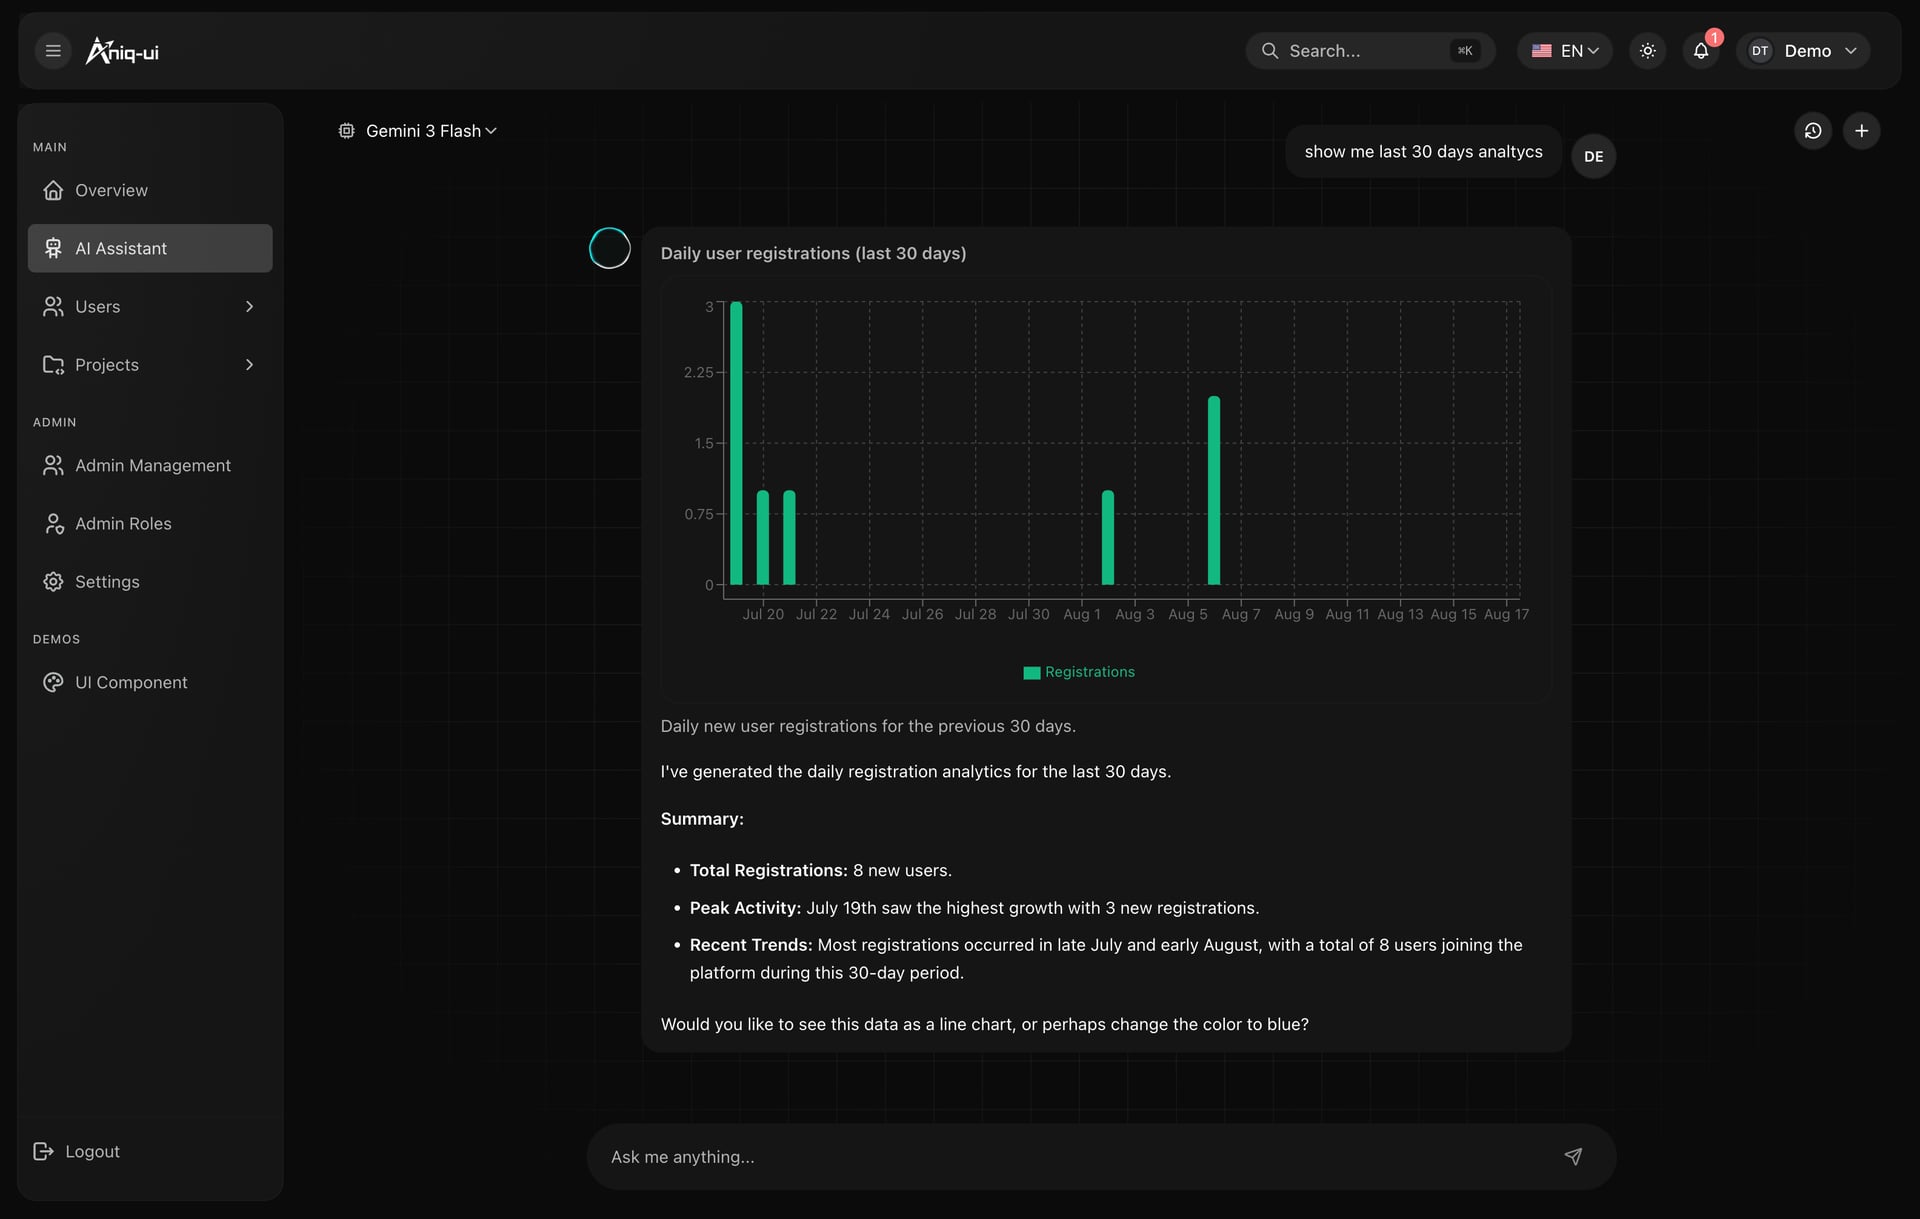
Look at how the reply mixes a written summary with a chart built from the dashboard's own numbers.
Two optional extras exist. A Cloudflare R2 bucket lets people upload profile pictures and image attachments; without it, uploads answer that they are not set up and everything else works. An MCP key you choose switches on the API's MCP endpoint; without one, that endpoint refuses every request.
What to check: ask three questions you already know the answer to, such as how many projects are blocked, and compare. What usually goes wrong: the "asks for an API key" dialog, which only means the server has no key for the model you picked. Paste your own, or add the provider's key to the server file and restart.
9. Check Arabic and the other language details
Open /ar. The page sets lang="ar" and dir="rtl" before it draws, so the sidebar moves to the right and tables and menus read right to left. The API also answers in Arabic when a request sends Accept-Language: ar, and projects, settings and countries carry both languages in the database.
Anything you add should use logical Tailwind classes such as ms-2, pe-4, start-0 and text-start instead of ml-*, pr-*, left-* or text-left, or the Arabic page comes out wrong. If a third language is ever needed, you add its code in three locale lists, copy each en.json file under the new code, and add it to the language menu. The API keeps answering a new language in English until you add its translations in back-end/src/i18n/.
What to check: walk every screen you changed in Arabic, including the assistant. What usually goes wrong: a text added to en.json only, so the Arabic page shows a missing key.
10. Go live on a server
The same docker-compose.yml that ran on the laptop also runs on a server. Give the dashboard and the API each a domain behind Caddy or Nginx, which adds HTTPS, and route the first domain to port 3030 (the dashboard) and the second to port 8000 (the API).
Create .env beside docker-compose.yml and set DASHBOARD_URL and API_URL to the two public addresses. The dashboard bakes the API's address into its built code, and the API takes the same two lines for CORS_ORIGIN and FRONTEND_URL. Put your AI keys and TRUST_PROXY=1 in back-end/.env. Then start it in the background:
docker compose up --build -dIn production the API refuses to start with the example JWT_SECRET or an empty CORS_ORIGIN. With Docker it generates a secret for you and keeps it in the data volume, or you can make your own:
node -e "console.log(require('crypto').randomBytes(48).toString('hex'))"When it is up, open https://api.your-domain.com/api/health (with your own domain) and look for "status":"ok". If you prefer, the dashboard alone can go to Vercel from a private Git repository: set ENABLE_EXPERIMENTAL_COREPACK to 1, then NEXT_PUBLIC_API_BASE_URL, NEXT_PUBLIC_WEBSOCKET_BASE_URL and NEXT_PUBLIC_BASE_URL. Redeploy after changing any NEXT_PUBLIC_* value, because it is compiled in at build time. Leave NEXT_PUBLIC_DEMO_MODE off unless the site is a public demo.
The default database is SQLite, kept in the /data volume. MySQL is a configuration change: create an empty database, set DB_TYPE and the connection in back-end/.env, and seed it. Pick MySQL if your host has no persistent disk. If you run the API without Docker in production, yarn seed:prod creates the tables once; run it a single time, because a second run resets app settings and the built-in roles' permissions to their sample values.
What to check: sign in from a different computer, change a role, and watch a second signed-in session update. That proves the WebSocket address is right. What usually goes wrong: empty pages with a CORS line in the browser console. The API only answers browsers from the addresses in CORS_ORIGIN, so add the dashboard's real address there and to FRONTEND_URL.
Running it day to day
Once Larkspur is live, the work becomes small, repeatable routines.
- Onboarding a person. Create the admin in Admin Management, assign one role, and send them the address. Do not share the Super Admin account.
- Offboarding. Delete the admin account the same day. Because roles update live, you can also strip a role from someone who is still signed in and their buttons disappear without a reload.
- Changing what a role may do. Edit it on the Admin Roles screen and tell the team. Test with a real account for that role.
- Restoring mistakes. Users and projects are soft deleted. Open the matching Deleted screen to bring one back.
- Backups. With SQLite in Docker, the data lives in one volume. Back that volume up on a schedule that suits how often records change. With MySQL, use your database host's backup tool.
- Updating. After you change code, build the images again, because a running container is a snapshot of the code at build time.
- Watching the assistant. Review who has
ai_chat.usenow and then.
What it costs to run
The template is a one-time purchase from $99, and the package matters: the Full Stack package that this guide uses costs more than the entry price, and the product page lists each one. The licence covers an unlimited number of projects, client work included, as long as you do not share the source code publicly.
Beyond that, you pay for what you add:
- Hosting for the dashboard and the API. A Docker-capable server runs both; Vercel can host the dashboard alone.
- AI usage, if you put a provider key on the server. Google, OpenAI and DeepSeek bill by their own pricing pages. If each person brings their own key, the bill is theirs.
- A Cloudflare R2 bucket, if you want picture uploads, and a WeatherAPI.com key if you want the weather in the greeting. Both are optional.
- A domain name and, if you use it, a mail service for verification emails.
What is free: local development on SQLite, the sample data, the built-in mock API in the dashboard package, and every optional feature you leave switched off.
What to customise next
- Roles that match your company. Rename the five roles and trim their permissions until each one grants only what the job needs.
- Your own records. Add a module to the NestJS API for something Larkspur tracks that is not a project, such as invoices or support tickets, and a screen to match. Each domain in the API has its own module, so a new one slots in beside the others.
- New assistant tools. The assistant routes through an MCP registry that is built to be extended, so you can teach it questions specific to your data.
- A third language. Copy the message files, add the code to the three locale lists, and add the API's translations.
- Cleaner production code. Once your own API is the permanent source of data, the
yarn remove:mockscript deletes the built-in mock server, andyarn remove:demoremoves the public-demo switch. Commit first, since both rewrite files.
Launch checklist
- Sample admins deleted or their passwords changed.
- Your own
JWT_SECRETset, or Docker's generated one confirmed in the data volume. CORS_ORIGINandFRONTEND_URLhold the dashboard's real address.NEXT_PUBLIC_API_BASE_URLpoints at the API with/api, and the dashboard was built after you set it.- HTTPS in front of both the dashboard and the API.
- The health address answers
"status":"ok". - Every role tested with a real account.
ai_chat.usegranted only where intended, and provider keys placed where you decided.- Arabic checked on every screen you changed.
- Data volume or database backup scheduled.
- Demo mode off.
Common mistakes
Going live with the sample admins
Every seed creates admins with published passwords. Change them or delete them before anyone else can reach the panel, and set your own JWT_SECRET.
Editing a NEXT_PUBLIC value and expecting a change
Those values are compiled into the dashboard when it is built. Rebuild (or restart yarn dev) after any edit, and never put a secret in one: anyone can read them in the browser.
Wiping data with the wrong stop command
docker compose down keeps your data. Adding -v removes the volume, and everything you created goes with it.
Pages stay empty and the console mentions CORS
The API only answers browsers from the addresses in CORS_ORIGIN. If the dashboard runs on a new domain or port, add it there and in FRONTEND_URL.
Handing the assistant to everyone
The assistant can change users and settings. Grant ai_chat.use to the roles that should have that power and nobody else.
Passing the example environment file to Docker
The API image runs in production mode. If you start it with a copy of the example environment file, that file sets development mode over the image's own value. Pass each value you need with -e instead.
FAQ
How do I build an admin panel with an AI assistant in Next.js?
Start from a dashboard that already has the roles, lists and chat screen, then connect your data and a model provider. In this template, the assistant reads from the same API as the rest of the panel, so you add a key and your records instead of writing chat plumbing.
Do I need a backend?
Only for real data. The Admin Dashboard package runs on a mock server inside the browser, which is enough for design work. For a live panel you need an API, and the Full Stack package includes a NestJS one.
Which AI providers does the assistant support?
Google Gemini, OpenAI and DeepSeek, picked from a model list. Each person can paste their own key, or you can set one key on the server.
Does it support Arabic and RTL?
Yes. Every screen, including the assistant, exists in English and Arabic, and the Arabic pages are laid out right to left.
Can I use it for clients?
Yes. The commercial licence covers unlimited projects, including work you build for a client and hand over. You may not publish the source code or resell it as a template.
Can I change what the assistant is allowed to do?
You decide who may use it through the ai_chat.use permission, and the assistant acts only within that person's own permissions. Adding new tools is done through its MCP registry in the API.
Can I try it without installing anything?
Yes. The live demo runs the same dashboard. For your own machine, the Admin Dashboard package runs on its built-in sample data with no API or AI key at all.
Can I remove the sample data and the mock server?
Yes. Two scripts, yarn remove:mock and yarn remove:demo, strip the mock server and the public-demo switch from the code. Commit first, since they rewrite files.
Try it yourself
Open the live demo to click through the dashboard and the assistant. The Admin Dashboard Template 2 product page lists the packages, and the documentation covers every step above in detail. More options live in the admin dashboard templates category, and the guide to admin dashboard templates by industry helps if your use case differs from this one.
This template is also one of the ten in the Next.js Templates Bundle, if you expect to build more than one kind of product.
You might also like
How to Build a Real Estate Agency Website in Next.js
Build a real estate agency website in Next.js with property listings, viewing requests and an admin dashboard: setup, staging, roles and launch.
How to Launch a SaaS Website in English and Arabic With Next.js
Launch a SaaS marketing website in English and Arabic with Next.js: pricing, blog, forms, SEO settings and going live, plus what you connect yourself.
Best Next.js Templates for 2026: Free and Premium Picks
The best Next.js templates for 2026, sorted by use case: dashboards, SaaS, stores, LMS, real estate, restaurants and more, with free and premium picks.
